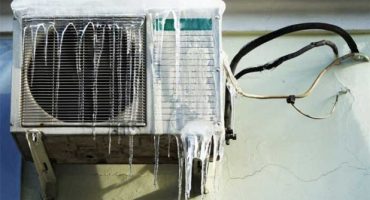
Today, the air conditioning compressor is an integral device of absolutely any car. The driver does not need to open the windows of the car in order to perform ventilation. And inside the house you can achieve maximum comfort thanks to the air conditioner, which will cool the room. Like other devices, the air conditioner also tends to break. The owner has difficulty in repairing. Repair can be done by yourself.

Like other devices, the air conditioner also tends to break, but it is not always necessary to call the wizard to fix it
The main feature of this unit is its functioning. Make-up is the engine power coming from the crankshaft using a power steering wheel. For the normal functioning of the entire device, all elements of the unit must be operational. These components are compressor, fan, evaporator and so on.
How to check the air conditioning compressor?
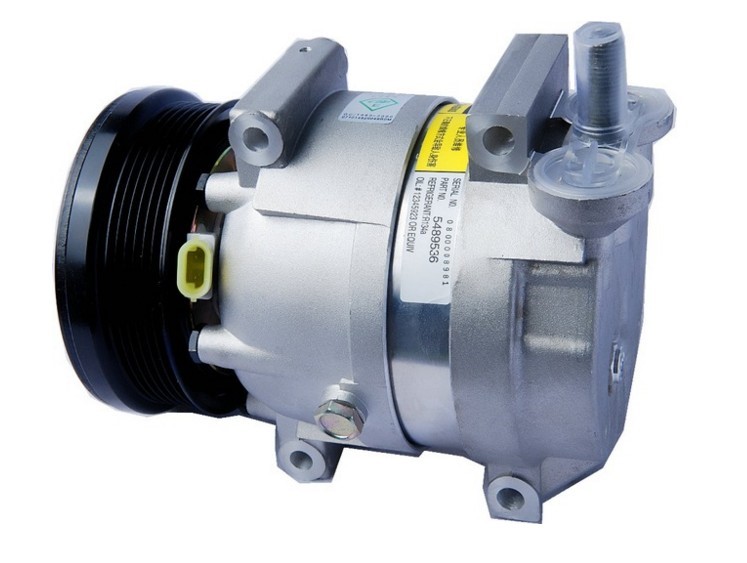
The air conditioning compressor looks like this
How to check the compressor in the air conditioner? The most common type of compressor are single-phase compressors, which have a start winding.
To gain access to the contacts, disassemble the air conditioner. It is important to gain access to the compressor after disassembly. Most often, contacts have protection in the form of a cover. The cover is screwed on. You can find the cover using wires suitable for the compressor. After you remove the cover, you can see 3 pins. Three terminals have terminals with wires.
First, remove the wires, and then measure the resistance between the terminals. Measurement can be done with a multimeter. The multimeter must be switched to a function that allows you to measure the resistance. This function on the unit is indicated by the symbol Ω. If this unit gives an indication of an infinitely large resistance between the terminals C and the others, then this means a break. In a built-in protection situation, it is important to be sure that the compressor is not overheated. If the protection is external then the compressor is faulty. In the event that the resistance indicator is almost equal to 0, then this indicates a short circuit and a malfunction of the element.
Depending on the power of this element of the air conditioner, the resistance value varies. The value must be between 1 and 20 ohms.
Each compressor has thermal protection, which can be built-in or external.
If the thermal protection is external, then it can be checked separately and replaced if it is faulty. In normal condition, it should be closed. Opening occurs only when a certain temperature is reached (100-120 ° C).
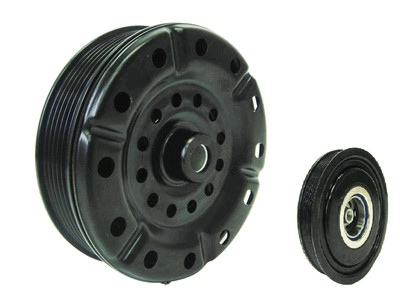
Coupling: check, replacement
The clutch is another reason why the air conditioner may not work
The inspection of the electromagnetic clutch includes checking the presence of lubricant on the rotor and pressure plate. Grease leaks should not be observed at the clutch bearing. Next, you need to use the apparatus, which will determine the resistance of the coil. The resistance value range must be from 3.15 to 3.45 at a temperature of 20 ° C.If the value does not match, then it is necessary to replace the old part with a new one. During the final stage, it is necessary to measure the clearance between the pulley and the disk of the electromagnetic clutch. If the indicator does not correspond to the norm, then the electromagnetic clutch will not be pressed against the pulley due to the magnetic field. The clearance should be between 0.35 and 0.65 millimeters.
Removing and replacing a compressor

Replacing and removing an air conditioning compressor starts with preliminary procedures
Replacing and removing an air conditioning compressor begins with preliminary procedures. At the very beginning, an oil test for acidity is done, an analysis of its color and composition is carried out. If everything is normal, then you do not need to rinse the external unit. If the opposite is true, then it is required.
If flushing is necessary, then it is impossible to refuse it, otherwise the waste of money for repairs is empty, because already dirty oil will return to the compressor. In this situation, it is best to turn to specialists for help, so experience and certain knowledge are needed.
The flushing process includes the following:
- The circuit is being disassembled.
- Next, flush the pipe, heat exchanger, thermostatic valve. For the procedure, specially designed fluids are used that have different characteristics. Liquids have excellent solubility properties for oil, are almost non-aggressive to humans, temperature - 25 ° C and above. So, with the help of a specially designed station, the fluid is carried out under high pressure.
- Then, liquid should be removed from each element.
- Then the assembly is carried out.
- At the end, two elements are evacuated: a block and a trunk.
In order not to encounter possible problems, you should also flush the indoor unit. This procedure is performed thanks to an anti-acid filter to simplify operation. It is installed, after which the device is “run” in cooling mode.
The compressor is installed in the unit, after which the unit is tested.
The compressor replacement procedure takes a lot of time. But thanks to the replacement, you can save your money by avoiding problems that may arise in the future.
Pulley removal
First, dismantle the air conditioner compressor.
First, dismantle the air conditioning compressor. The following procedure is carried out:
- Remove the instrument drive.
- Disconnect the wiring from the control valve.
- Loosen the nuts.
- Disconnect the handset. Unscrew 3 bolts from the compressor.
Then remove the compressor.
Then clamp the coupling in a vice. Unscrew the head by seven with an extension cord. The clutch should turn counterclockwise, and the key - vice versa. Remove the snap ring and unscrew the coupling further. You will be able to remove the cover.
Then remove the snap ring and pull the sleeve.
Air conditioning compressor wiring diagram
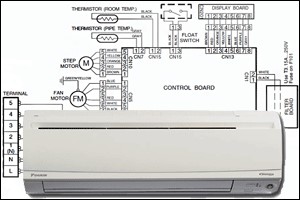
How to connect the air conditioner after repair
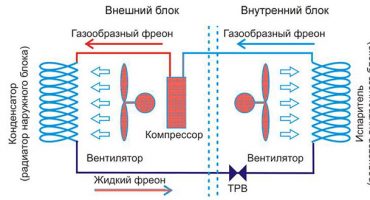
Air conditioning, like other cooling devices, have a connection diagram. The diagram shows the elements and the connections between them.
This air conditioning technique has two functional parts. These parts are:
- Refrigeration circuit.
- Electrical part.
The refrigeration circuit performs cooling, which is the main function. The remaining elements are controlled by an electronic circuit.
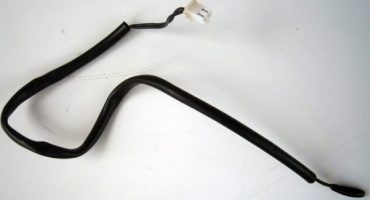
Lengthening the air conditioning tube

Air conditioning tubes
There are several ways for this work. The following options are used depending on the situation:
- Increase the handset. To do this, make an internal insertion of a piece of tube of the required diameter in the connection area. Then tighten with a clamp. Then attach.
- The next option is to conduct a drainage system indoors.
- Make a tube extension and drain the drain to the side. You need to attach to the new bracket.
These are the most effective ways that can bring results.
When installing the air conditioner, specially designed tubes are used that connect the external unit of the split system to the internal unit. Freon passes through them. In this case, the diameter of the special tubes is of great importance.
The size of the tubes affects the following:
- An incorrect size can result in a loss of pressure in the refrigerant line.
- Size affects the return of oil in a particular technique.
- Freon transportation speed is completely dependent on the diameter of special tubes.
If the size of these elements is not selected correctly, then the cooling system will not be able to fully function. Information on the sizes of specially designed tubes can be found in the unit installation instructions. Installers can ignore this important parameter.
This, in the end, will lead to the fact that the device will produce a small amount of cold, and energy consumption will increase.
The diameter of the specially designed tubes varies from 0.25 to 0.75 inches. If the tube is large in diameter, then freon has a gaseous state. In the presence of tubes of smaller thickness, freon is transported in a liquid state.
It is worth noting that for different models of air conditioners there are certain sizes of tubes, so this factor should be taken into account. Before installing the device, be sure to carefully read the instructions.
Bearing replacement
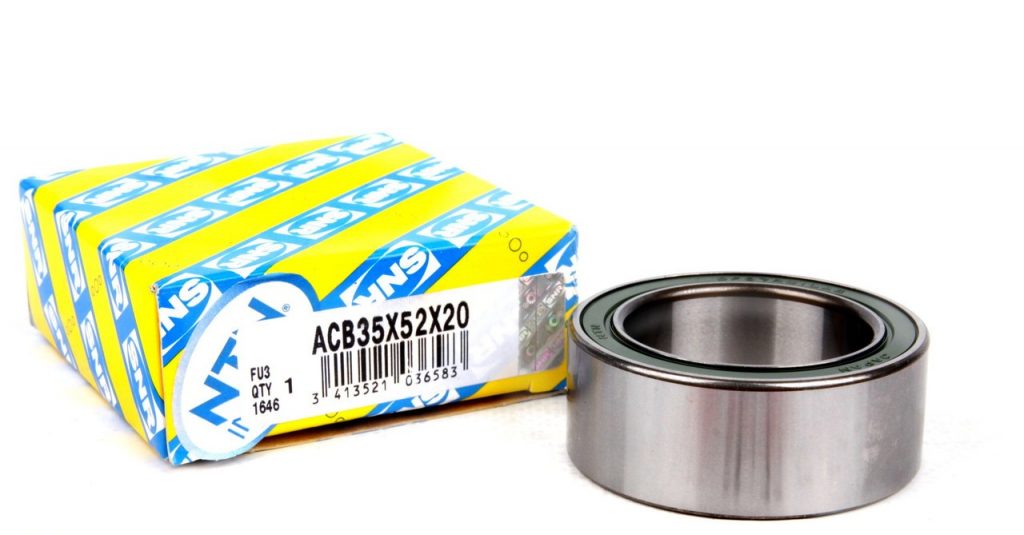
The air conditioner bearing may become unusable over time
The bearing may become unusable over time. There may be several reasons:
- Damage can occur as a result of a long operation of the equipment, which is natural.
- The belt may have a stretch.
- Lack of materials for lubrication.
Therefore, you may need to change this part. This process is divided into several stages:
- First remove the compressor. Do this with utmost care.
- Eliminate freon from the system.
- Remove the pulley. This can be done using a specially designed puller.
- Use the press to remove the bearing.
- Using a press, replace the old bearing with a new part.
- Everything needs to be repeated again only in the reverse order.
- Check for leaks.
- Then you need to fill in the freon.
It is important not to forget that absolutely any problems associated with the functioning of the compressor bearing must be quickly removed. Thanks to this, you can save your money on repairs, and you will be able to avoid possible problems.
The air conditioner can also break down, like any equipment, therefore, repair and replacement of some elements is also required. If you feel insecure, it is better to entrust the work to professionals. It can be both cheap and expensive, but high quality.