The storage water heater provides the country house with hot water year-round. In urban apartments, it is also often installed in order not to feel discomfort during summer hot water outages. If the device fails, its owner is faced with a choice:
- take the water heater to a service center;
- call the master at home.
Both options are associated with the cost of funds, and, most importantly, time. All the while waiting for the master or repair in the workshop, the owner will sit without hot water.
However, there is a third way - try to determine the malfunction and repair the faulty boiler yourself. Not all, but many problems in the operation of the device can be eliminated with your own hands if you possess the initial skills in electrical engineering and locksmithing.
Preparation for diagnosis and repair
Before you begin to troubleshoot a problem, do the following:
- Disconnect the device from the power supply. Unplug the plug or disconnect the automatic fuse (if the device has a permanent connection).
- Turn off the cold water tap and the hot water tap at the outlet of the device.
- Disconnect pipe or flexible cold water inlet.
- Drain the prepared container. A small amount of water will flow out of this nozzle.
- Disconnect the hot water pipe. Drain the tank completely into the prepared container. If possible, attach a flexible hose and drain into the drain.
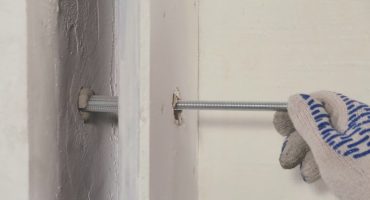
- Remove the boiler. This is best done with an assistant - the device weighs a lot, especially if precipitation has accumulated in it.
Attention! Be careful if the water does not have time to cool. Hot water can cause severe burns.
Breakdown detection
Boiler ariston
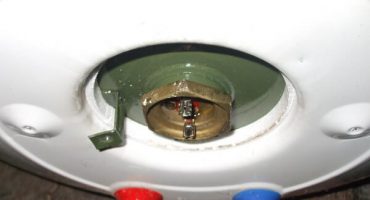
First you need to remove the bottom cover that covers the conclusions of the electric heater, contact groups and the rest of the electrics.
Attention! Before disconnecting the wires, they must be marked and photographed. This will help to correctly attach them back during assembly.
The following operations are performed in the following order:
- Disconnect the contacts of the electric heating element (TEN).
- Remove the connectors from the thermostat contacts.
- Unscrew the nut securing the thermostat.
- Remove the sensor element of the thermostat from the recess of the heater.
- unscrew the nuts holding the flange of the heater.
Extracted heater with anode in good condition
- Gently remove the electric heater from the device body.
Now you can inspect the heater - for signs of corrosion or other damage to its body. Next, you need to check the resistance between the contacts of the electric heater with a tester:
- Zero resistance: in TENE short circuit
- Infinite resistance: it means a break.
A serviceable element has some finite resistance. A faulty heater is not subject to repair. Egor will have to be replaced with a new one. In this case, it is permissible to use any heater, suitable in the form of fastening, of the same or less power. When using an element of lower power, the water will heat up longer, and energy consumption will be reduced. It is unacceptable to install a heater with a larger power - it is possible to cause overheating of the device and its failure.
Assembly preparation
Tank deposits
After finding the source of damage to the electric heater, suitable spare parts are bought to replace the failed ones.
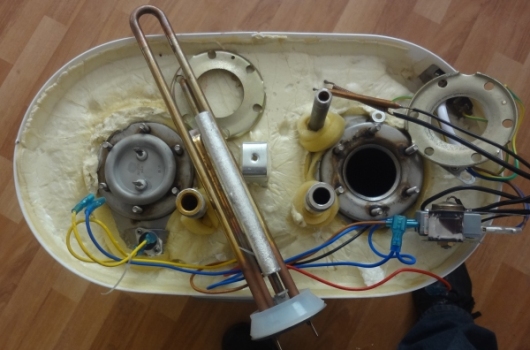
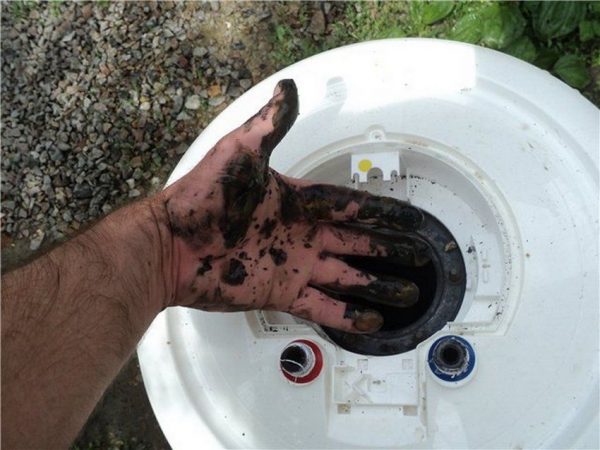
During operation of the device, deposits accumulate on the inner surface of the tank. The higher the calcium content in the water, the more there are.
Before assembling the device, carefully clean the heater tank. During cleaning, be careful, be sure to use protective gloves and do not use sharp objects that could damage the inside of the tank. You should also check the condition of the magnesium anode - if it is substantially worn, it must be replaced. The user manual recommends changing the anode once a year.
Assembly
After cleaning the tank and replacing the anode, you can proceed with the installation of a working heater. When choosing a compatible assembly, make sure that the thermostat fits both the contacts and the location of the tube for the temperature sensor.
The water heater is assembled in the following order:
- Replace the silicone gasket. Despite the long service life of silicone products, it is better to replace it with a new one. Rubber gasket must be replaced. It costs inexpensively, leakage will cost much more.
- Fasten the magnesium anode to the appropriate mount on the heater.
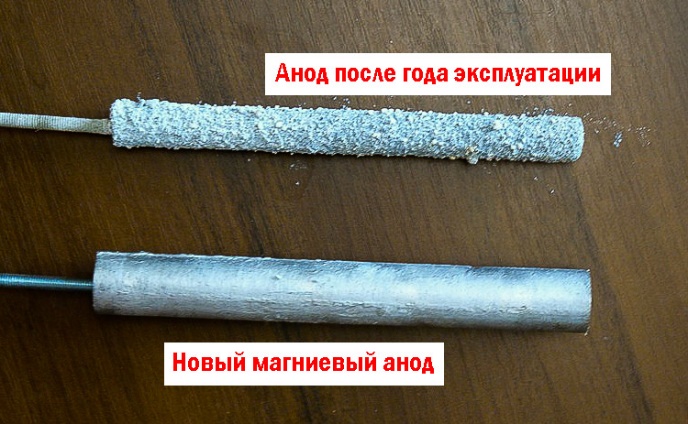
Anode wear
- Press the heater into the housing with the mounting flange and tighten the nuts. They should first be screwed up before the start of resistance, then they are tightened in turn, the next nut should be adjacent to the nut diametrically opposite to the previous one.
- Assembly is carried out in the reverse order of disassembly. After tightening the TEN mounting nuts, connect the wires using the marking and photo taken before disassembling.
- Fasten the protective cover.
- Hang the unit on the wall. For this, it is also better to attract an assistant.
The next step is to connect the nozzles. Carefully monitor the seal of all joints. If threaded couplings are used, they should replace the FUM tape or linen thread.
Next, the heater tank is filled with water and carefully monitor all connections and seals. If there is no leak anywhere, you can proceed to trial inclusion in the network.
The heater is ready to further ensure your comfort and convenience.
Typical boiler failures and their causes
Before you start disassembling the device, you can check the most common cause of breakdowns:
- the device does not turn on;
- when turned on, the circuit breaker fuses;
- the device turns on, but does not heat water to the required temperature;
- leakage.
Leakage in the area of the heating element seal is usually easy to repair. You just need to replace the gasket, it is inexpensive.
If water comes from the storage tank, you will have to think about buying a new unit. The tank is practically not suitable for repair, especially at home.
Heating elements, or heating elements, are the most loaded unit of the device. Constant heating, exposure to chemicals dissolved in water leads to their rapid wear. TENY fail most often.
The signs suggesting a malfunction of the heating element are as follows:
- frequent tripping of a safety circuit breaker;
- water is not heated sufficiently or is not heated at all;
- the visible part of the heater has mechanical damage, the wires are darkened or melted.
If one or more of these signs appears, check the resistance of the heater with a tester or an ohmmeter. To do this, remove the contacts from the terminals of the heater and measure its internal resistance. If it is zero, a short circuit has occurred, if it is infinite, a break has occurred.
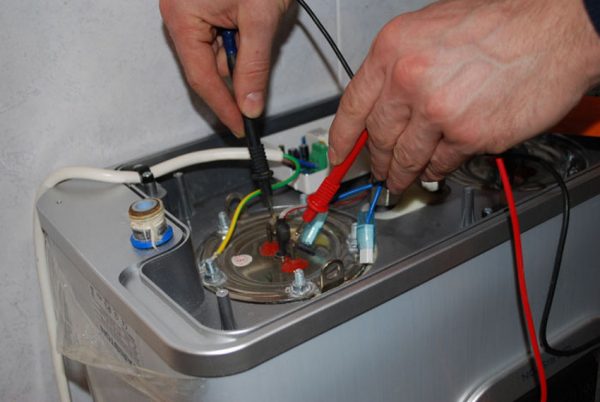
Resistance measurement
And in that, and in another case, the heater is subject to replacement - they can not be repaired.
The most common causes of failure of an electric heating element include:
- Exhausted resource. Usually TENA lasts for several years.
- Elements that worked for some time without water or at insufficient pressure are susceptible to breakage.
- Constant power surges, instability of power supply.
To replace the heating element, you can call the master at home or contact a service center. However, a home master who knows how to handle a screwdriver, pliers and a wrench can easily replace a heater with his own. This will save money and, above all, time.
Failures that can be detected and repaired by yourself
A number of malfunctions of the electric heater can be detected and corrected independently. These are relatively simple problems that can be eliminated by replacing certain parts or assemblies.
TEN
A characteristic sign of a malfunction of the heating element is the lack of heating or insufficient heating of the water. The failure of the heating element is also indicated by the frequent operation of the safety circuit breaker. If the voltage at the terminals of the heating element is normal and there is no heating, check its internal resistance. To do this, the device must be de-energized and the terminals removed from the contacts of the heater.
TEN with the removed anode
If the tester showed zero or infinite resistance - the heater is faulty and will have to be changed.
Thermostat
This node breaks less often TENA, but also can fail. If the heater is OK, but does not turn on to heat the water, it will have to be replaced. This is quite simple to do - you need to disconnect the device and pull out the thermostat, taking it by the head.
It is not necessary to dismantle the tank or the heater.
Leakage
Leakage can be caused by a number of reasons. The most common is a failure of the gasket of the mounting flange of the heating element. In this case, the costs will be minimal, but you will have to tinker with the removal, disassembly and reinstallation of the device.
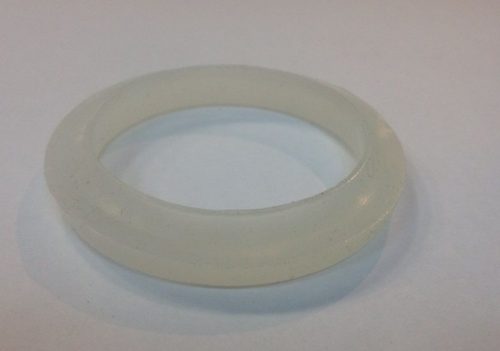
Silicone gasket
If the leak was formed as a result of corrosion of the tank material caused by the lack of grounding, the development of the life of the magnesium anode, then things are bad. The tank cannot be repaired at home. Often they refuse to repair it in the workshops - in most models the tank cannot be separated from the thermal insulation. Almost all manufacturers do not supply a tank as a spare part. Have to buy a new heater entirely.
Sludge tank contamination
There is one more malfunction, which is not related to the breakdown of certain parts or components of the device. This is a tank contamination with mineral deposits. Such precipitates in small amounts are formed during the normal operation of the device, especially in highly mineralized water.
The main symptoms of this problem are:
- Reduced unit performance. Heating to a given temperature takes longer and longer.
- When working from the tank, hissing or gurgling is heard.
- Hot water dispensed by the device becomes cloudy with a yellow tint. It smells bad of rotten eggs.
Contamination with mineral deposits occurs during run time of 2-3 years.
In such a situation, the heater tank will need cleaning.
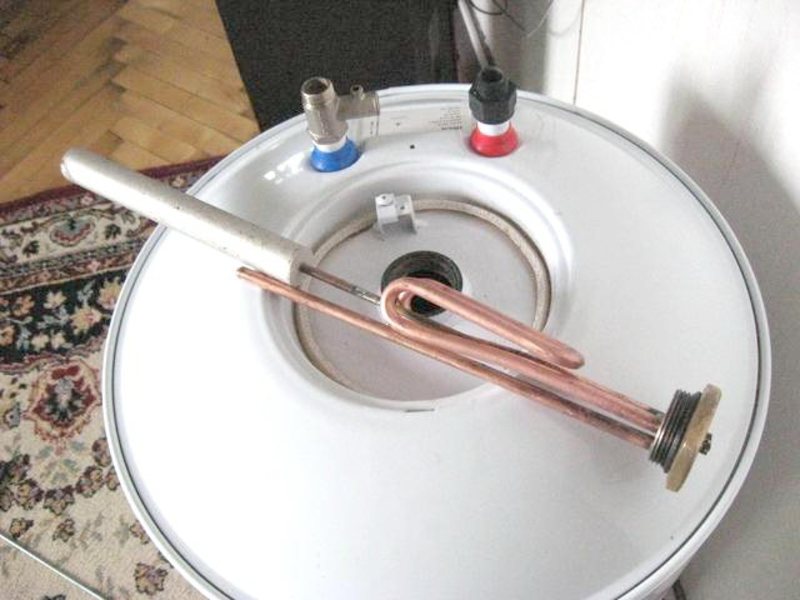
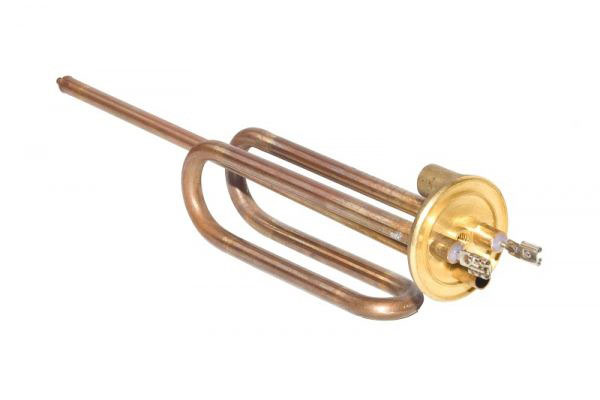
Prepared for installation of a heating element with anode attached
A skilled home master can well handle this procedure on his own. For her, you need to prepare a flexible hose to drain the water from the tank into the drainage. If for some reason this is not possible, then a tank equal in capacity to the heater’s displacement is required.
The procedure for cleaning the tank is as follows:
- First of all, it is necessary to disconnect the device being repaired from the network.
- Remove the protective cover from the bottom of the water heater.
- Remove the thermostat, disconnect the wires from the contacts of the heater.
- Turn off the cold water tap.
- Using a hose, drain water from the tank into the drain or into the prepared tank. Be careful if the water is not completely cool.
- Unscrew the nuts securing the heating element flange. If the nuts are “stuck”, fill them with WD-40 for several minutes and try again.
- Carefully remove the heating element from the tank opening.Carefully remove deposits from it. Always wear protective gloves and glasses. Do not use sharp metal objects - they can damage the heater. It is likely that the heating element will have to be replaced with a new one.
- With the same care, using a flashlight and a mirror on the handle, the tank should be cleaned.
- Rinse and wipe the tank.
- Replace the magnesium anode with a new one and reassemble the unit in the reverse order, remembering to replace the gasket.
In other cases, do not overestimate your strength and try to repair the unit at home. It's time to call the master or contact the repair organization. Unfortunately, most of these failures, for example, leaking in the storage tank, will not be fixed in the service center. Have to think about purchasing a new device.
Important! Repairs malfunctioning boiler do-it-yourself can only be carried out with electric water heaters. If a gas boiler is flashed, be sure to contact a repair shop or a certified craftsman.