Manufacturers of household appliances offer a wide range of devices for compensating and purifying oxygen in the room. Buyers who decide to independently install the hood, without resorting to the help of a specialized organization, must follow the basic building codes. You also need to know how to integrate the hood into the cabinet with your own hands.

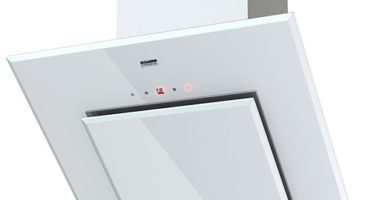
Built-in hood model
Installation scheme for built-in hoods
Considering the important question of how to hang the built-in hood, it is worth first considering the scheme and its important features:
- food for household and industrial appliances can be of different voltages. For home kitchen use 220 V, for industrial - 380 V;
- engine power is selected in accordance with the mains. After making sure of the settings of the introductory machine, if there is an RCD with a disconnecting current of 50 Ma, the machine should be at least 16–32 A. At the same time, the engine power should not exceed 1.5–2 kW;
- you must select the cross-section of the supplying electric cable for the maximum load of the motor, lighting lamp, speed switch and starting capacitor;
- starting capacitor should have a capacity of not more than 200 microfarads.
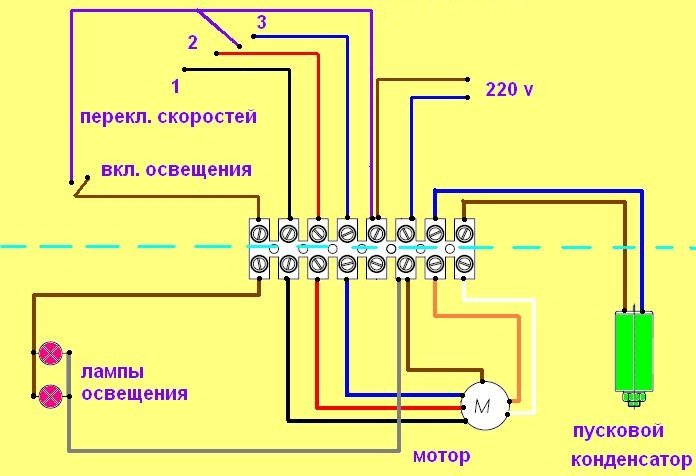
Device diagram
It is better to use PVA, PVSG, PVSiSh wires with a cross section of 4 square meters. mm with armored insulation that protects against electric shock.
On the terminal block we find the marking:
- “Phase” - has, as a rule, a blue-blue color;
- “Earth” is black;
- "Zero" - yellow-green along the entire length.
After verifying the reliability of the terminal connections, we connect the wires according to the phasing. The presence of voltage is determined by the signaling of two warning lamps.
The speed switch has 3 positions - 950/1500/3000 rpm. When adding speed for a soft start, a starting capacitor is used.
The number of terminal blocks depends on the type of network - two-, three- or four-wire. In the indicated diagram, the hood is connected at 220 V. If the connection is made from a distribution block, the correct connection must be observed. The phase wire is selected using an indicator, a low voltage indicator - this is in case there is no color.
Duct selection: features, classification
Hoods can be located in two positions:
- The horizontal location. The main advantage of this type is a simplified cartridge replacement scheme. Such a hood is not inferior in performance and energy consumption to modern appliances.
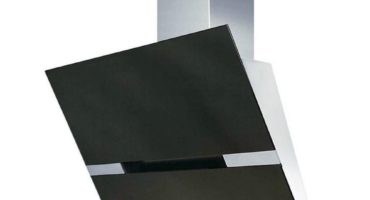
- Vertical layout - installation in the kitchen is done in an open way. A popular method because of the simple replacement of filter elements.
You can choose another installation option that does not require special regulations and state standards. But when it is executed, it is worth following all the rules and recommendations for fixing kitchen appliances.
Be sure to be made flexible communication. It is produced using high-strength polymer materials:
- polypropylene glycol;
- polypropylene;
- polypropylene carbon;
- polypropenulating chemical elements of the second group.
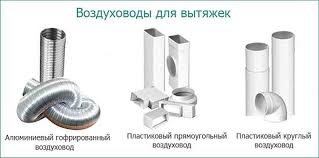
Types of ducts
Ventilation must be adequate for the volume (at least ½) of the fume hood.For insertion of the air channel, it is necessary to obtain approval from interested services.
When choosing an air channel for air removal, it is worth considering angles with a size greater than or less than 90 degrees. If this condition is not met, air will not be supplied. Thermoregulation must be performed under such conditions that the check valve can shut off the air supply to the filter.
The hole should be made in advance for the duct
How to integrate the hood into the cabinet yourself
In order to install or reinstall the hood, you will need:
- means for marking - a pencil or marker;
- roulette or joiner's corner;
- wood drill with a diameter of 10 mm;
- jigsaw or saw, which is designed specifically for wood with a scan of teeth inside the blade;
- if there is a round hole for the duct, it is worth preparing a saw for the jigsaw, which is specially designed for curved cuts. It is important that the device has a straight tooth and a small canvas width;
- special screwdriver for work with confirmations;
- 4 single corners made of plastic material;
- awl;
- screws with a standard size of 3.5 × 16, which are designed specifically for chipboard. It is worth using elements of white color;
- any glue with a waterproof structure.

Saw for curly cuts
The above set of tools is required to install the hood in the cabinet.
Below we consider the scheme for installing the hood in a cabinet with swing doors. It is worth paying attention to the fact that the installation may require the transfer of loops. This process can be done independently, for this you need a regular screwdriver. If you do not know how to do this, you can view detailed instructions on the Internet.
How to insert a hood into a kitchen cabinet
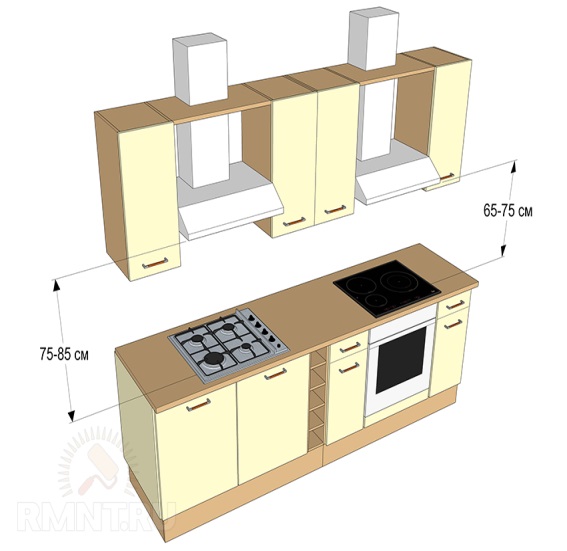
Space dimensions from work surface to hood
We will figure out how to properly integrate the hood into the cabinet with our own hands. The sidebar is divided into stages:
- remove the middle shelf, cut out the geometrically regular shape, where the device will be mounted;
- after dismantling, open the holes with a special tool for electrical connection;
- fix all the elements in the cabinet: hood and doors;
- if the large cabinet has a side, it is enough to use a jigsaw with a large tooth or with a small one;
- after sampling, open the holes in the lower shelf with sandpaper, a grinding wheel with an abrasive value of 1.5–2.5 mm.
Fastening process
The hood is mounted in the following way:
- The place where the hood will be attached is selected;
- if a flange connection is required (round, triangular, rectangular, oval), an angle of 90 degrees is selected along the diagonal;
- corners are screwed in sequence, all 4 pieces, using bits with a diameter of 0.1-0.4 mm;
- wood screws are screwed in according to the thickness of the rear wall of the cabinet in which the hood will be mounted;
- for camouflage screws, it is recommended to use paint coatings made on a water-based basis, white.
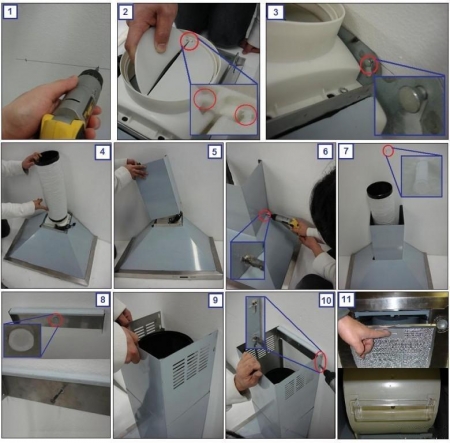
Installation
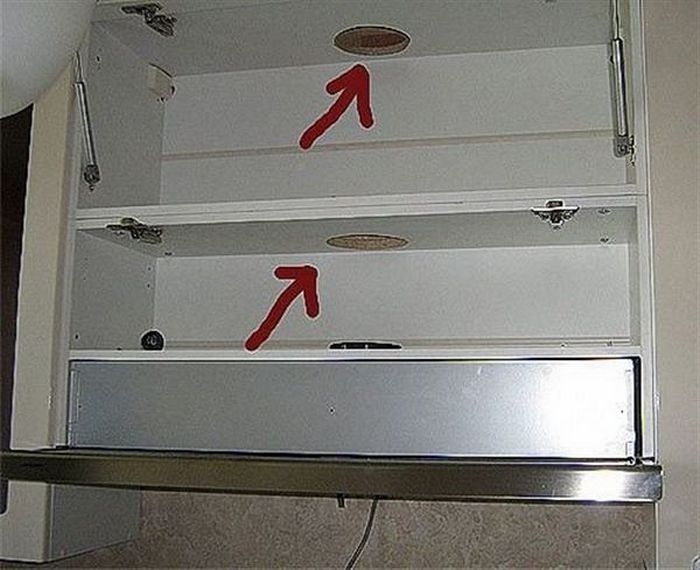
How to make holes for the duct
It is worth using a cabinet with a modified upper and lower shelf. It is important that there is a possibility for cutting openings for the duct.
Hole cutting is performed as follows:
- Use a marker to mark a rectangle or circle. The shape of the hole depends on the type of duct used;
- if a rectangular hole is required, then holes must be drilled in each of the corners;
- if a duct with a circular cross section is used, then it will be enough to make one hole with a diameter of 10 mm. You can calmly stick a saw into it;
- then using a special jigsaw, holes are cut out under the duct;
- after that, the end of the chipboard in the place with a cut needs to be treated with a special adhesive from a polymer base. It will provide protection against moisture;
- then the areas of fastenings of the built-in hood are marked.To do this, a shelf with a hole is removed, applied to the product and punctured with an awl;
- when done, the product is fully installed in the cabinet.
Set all items
It is important to complete everything accurately, so when installing the hood with an air duct, the following important recommendations should be considered:
- first, all 4 corners are screwed to the shelf;
- remove the cabinet, put it on the floor flat back wall and set the shelf in its place;
- with an awl, punctures of the placement of screws on the side wall are made;
- corners are fixed by zero offset of the shelf;
- at the end, the hood is installed. It is fixed on self-tapping screws.
Useful recommendations for installation and operation of the built-in hood
During installation and operation of the hood, the following important recommendations should be observed:
- It is recommended to entrust the installation and connection of the hood to an exhaust and supply ventilation specialist;

Better entrust the installation to professionals
- The duct for the passive exhaust should be larger than for the active;
- Grounding devices must not be neglected. The fact is that the work will be carried out in a moist, alkaline and aggressive environment with a Ph1 level;
- It must be borne in mind that the height of the device above the hob varies between 65-75 cm. If these dimensions are not respected, the device will not cope with its functions;
- When doing the installation yourself, you need to choose the color and design of the hood. This device can be selected for the interior and dimensions of the kitchen;
- Cleaning of coarse and fine filters, as well as air ducts, is prohibited by compressed air, inert gases. A complete replacement of the filter elements is required. It is also not recommended to use flammable liquids, combustible and cotton products;
- The most high-quality filters that are used in hoods are considered German - from manufacturers such as Raptor and Indego. They have high performance and wear resistance.
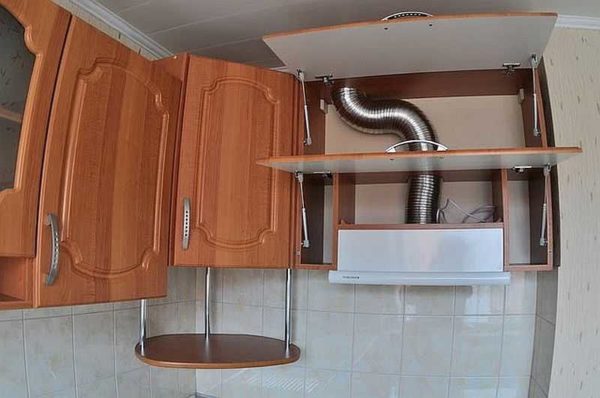
Example of installing a hood
Installing the hood in a cabinet is a rather complicated process, during which it is necessary to take into account important nuances and features. It is advisable at the initial stage to choose a special cabinet, measure its dimensions and choose a place for its installation. After that, it will be possible to proceed with the selection of a hood that can fit in it. If you doubt your abilities, it is better to use the services of professionals.