Summer and autumn delight gardeners with plentiful harvests. Unfortunately, it is impossible to store crops at home for a long time. To recycle it, you will need a juicer. You can buy it, or you can make it yourself from a used washing machine. To do this, you must have the skills of metalwork and welding.
The principle of operation of the juicer
The method of operation of the juicer is very simple: it violates the integrity of apples, grapes, apricots, etc., dividing them into a liquid fraction - juice and dehydrated fiber - cake. The main components of the juicer are as follows:
- Bunker where fruits or berries are loaded
- A chopper that destroys the skin and structure of the fetus. Rotary knives or drum grater are used.
- A device for squeezing juice. This can be a press or centrifugal force arising in a rotating drum.
- The filter separating the liquid fraction and the cake.
- Bottle stand or juice container
The simplest juicer is a construction mixer clamped in a high-speed drill chuck.
Materials and Tools
The more difficult to manufacture, but also giving higher-quality products, do-it-yourself juicer design is based on a front-loading washer that has served its purpose.
At the first stage, you need to remove the nodes that are no longer useful:
- pump;
- water heating system;
- control system;
- pipelines and valves for water and drain;
- back wall and bottom.
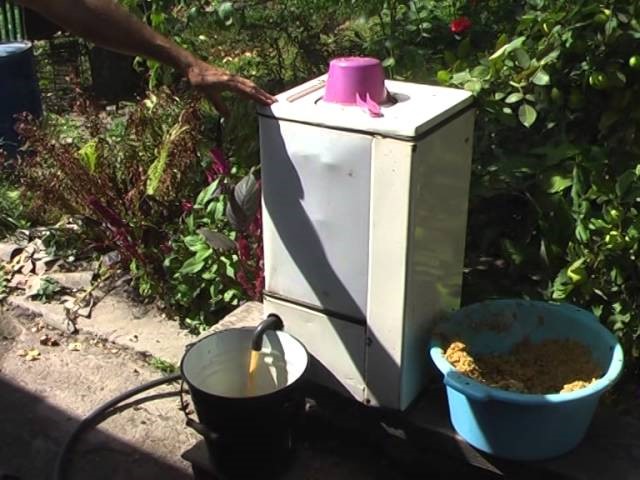
General view of the device
From the materials you will need:
- Two springs for cushioning the drum. They are designed to balance the increased horizontal centrifugal force, since the device will be operated with the hatch up.
- Two strips of metal mesh 300 * 60 mm.
- Capacity for the accumulation of juice.
- Branch pipe for discharge.
- Stubs.
- Fasteners.
Of the tools needed:
- high-speed screwdriver or drill;
- Angle Grinder;
- welding machine;
- a set of hand tools.
You will also need a workbench with a vise.
Washing machine juicer
The following is an instruction on how to make a juicer out of a washing machine.
To dismantle the machine, put it on the back wall and secure it. The following should remain on the frame:
- loading hatch;
- sealing cuff;
- drum;
- electric motor and drive.
Next, you must perform the following operations:
- remove the belt rotating the drum from the pulleys;
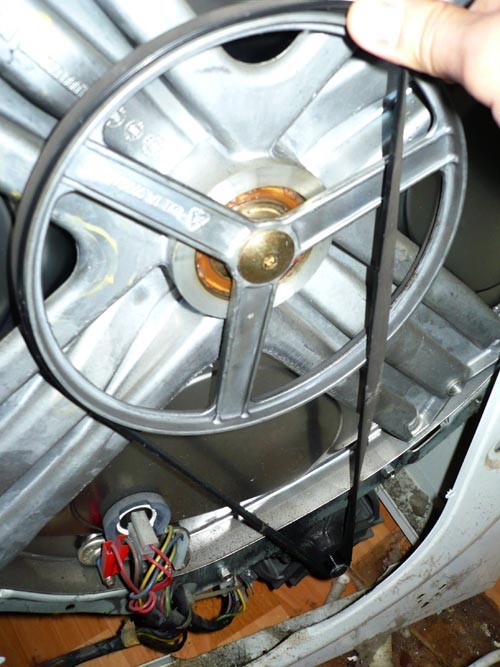
Pulley removal
- remove the shock absorbing springs and other parts that interfere with the removal of the tank;
- remove the sealing sleeve;
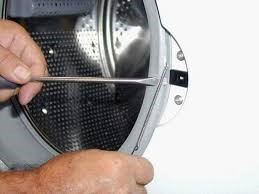
Cuff removal
- remove the drum and tank;
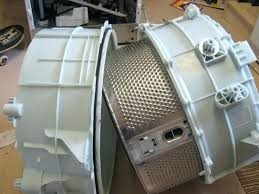
Drum and tank removal
- clean them from contamination, rinse with vinegar.
Heating elements, sensors and other equipment should also be removed from the tank and the remaining openings should be plugged with rubber plugs.
Now comes the stage of finalizing parts and assemblies:
- Reassemble the tank and secure it in its original place.
- Insert sealing sleeve.
- Brew holes in the drum.
- Remove the ribs inside the drum. Mounts do not need to be removed.
- Drill in it 100-200 holes with a diameter of 1 - 1.5 mm.
- Inside the drum, fasten the strips of the mesh between the points of attachment of the ribs with screws.
- Secure shock absorber springs.
- Connect the electric motor to the network through the switch. Engine power should be at least 1-1.5 kilowatts.
- Finally fix the device on a horizontal base with the hatch up.
Test run should be carried out without loading. The drum must not touch the walls of the tank during rotation. If everything is in order, you need to substitute a juice container for the drain pipe.
Fruits placed in the drum will break into slurry, hitting the nets, attaching the ribs and each other. A centrifugal force squeezes the juice through the openings into the tank, from where it drains into the storage tank.
How to make a loading hopper and pusher
For a dosed loading of fruits, you will need to make a hopper. It can be made from a piece of plastic pipe with a diameter of 100 mm. It is fixed obliquely so that the fruit rolls onto the edge of the grater. The hopper is attached to the device body with aluminum or steel corners on bolts

Hopper Pipe
The pusher can be made of birch shank for shovels. A circle of plywood with a diameter of 5 mm less than the diameter of the pipe is attached to the lower edge. A transverse stop is installed on the top.
Washing machine grain grinder
A grain mill for industrial production is not cheap. If a home master has the skills of metalwork, electrical and welding, and in the pantry there is a failed activator-type washing machine, then it is entirely possible to remake it into a grain mill, or, as they say, grind.
Washing machine grain crusher
Necessary materials, tools and construction
For the manufacture of grain crushers
- Oka washing machine - 1 pc.;
- knives for crushing grain -3 pcs.;
- grid with a mesh of 2-3 mm;
- tin and rubber for gaskets;
- sleeve;
- flange.
- piece of plastic pipe with a diameter of 100-150 mm
Of the tools and equipment useful:
- drill or high-speed screwdriver;
- a set of hand tools;
- angle grinder, or grinder.
Changes made to the design of the machine come down to replacing the activator with flat knives with bent ends. The grain is poured into the hopper (2), which serves as the tank of the washing machine. Rotating, the knives (4) crush the grain and discard it on the calibration grid (7). Grain particles smaller than the lattice cell pass through it and fall into the funnel (8) and then into the storage tank. Particles that do not pass through the grate return to the knives with a stream of grain and are crushed again.
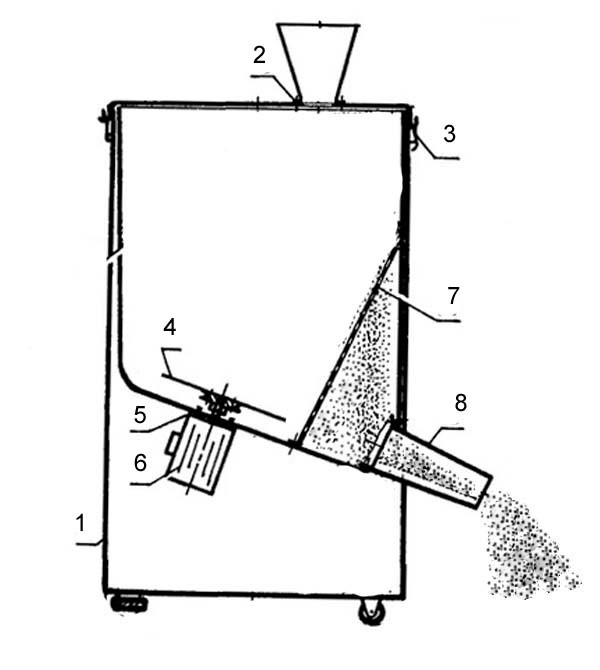
Grain crusher
In preparation, you will need to remove the plastic pad of the activator. Knives are made of a steel strip 3-4 mm thick, their ends need to be bent in opposite directions so that they do not touch the walls of the tank. The hole for mounting on the shaft should be drilled exactly in the middle of the strip, otherwise it will be poorly balanced and will cause beating during rotation. The flange is put on the pulley on one side of the side; on the other hand, it has a threaded rod for attaching knives. You should also prepare a rubber gasket and a square plate of tin to prevent grain from entering the drive.
Device assembly
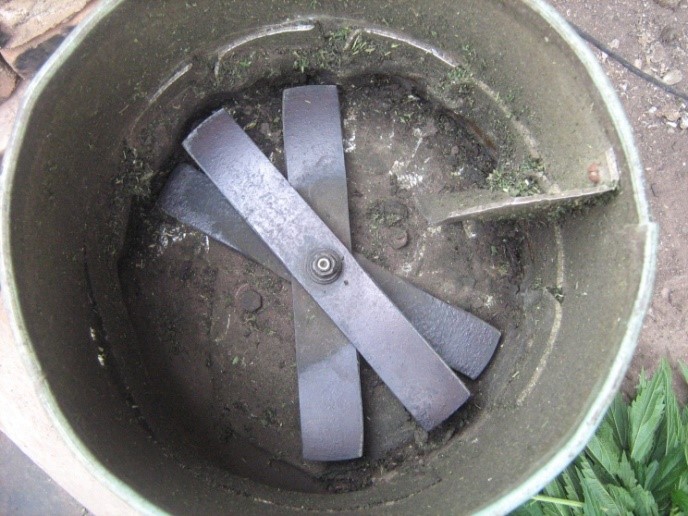
Grain Mill - Top View
Assembly begins by attaching the chopper knives to the flange. Next, the sleeve, passing through the gaskets, is attached to the pulley. The patch should be attached to the tank body so that the knives do not touch it during rotation.
The next stage is the installation of a funnel for collecting and discharging crushed grain. The drain located at the very bottom of the tank will not be converted. The sequence of operations is as follows:
- With a chisel or grinder, bring the drain hole to a diameter of 120-150 mm.
- Insert a piece of pipe into the hole and secure it.
- Bring the pipe to the side and direct it to the storage tank.
The next step is the installation of a grating separator. To do this, you must:
- Mark the installation line at the bottom of the tank so that it is 1-2 cm from the zone of rotation of the knives.
- Cut the grill out of the mesh so that it is perpendicular to the bottom of the tank and fits snugly to the bottom and to the side walls.
- Secure the grill with screws to the tank surface. For reliability, you can use clamping strips of thin strips cut from a sheet of metal.
- Slots should be coated with a “cold welding” type compound or silicone sealant.
Before a test run, you need to securely fasten the device to prevent it from tipping over or falling. Test run is carried out without grain. In its course it is necessary to make sure that
- knives do not touch the bottom of the tank and the gasket;
- the knives are well fixed on the sleeve, and the sleeve on the flange;
- no beating of knives due to imbalance.
If a run-out is detected, balancing is done by balancing the knife along the hole line. Small parts are drilled in the lowered part until the parts are balanced.
After a successful test run, you need to make sure that there is a storage tank under the outlet. Then you can put about 5-7 liters of grain into the tank, close the tank with a lid and turn on the machine at maximum speed. To reduce dust, a coverlet can be thrown over the cover.
The new life of the washing machine as a grain mill has begun. Bon appetit for your pets.
Other manufacturing methods for juicers
If the skills of the home master do not allow you to make a juicer from a washing machine or just do not have such a machine at hand, you can also process the crop in another way.
To grind fruit, a construction mixer is suitable with which solutions or paint are mixed. Several holes are drilled in its lower part; bolts protruding 10-15 mm are screwed into them. The fruits are crushed in a bucket, then the mass is placed in a woven bag and put into the press.
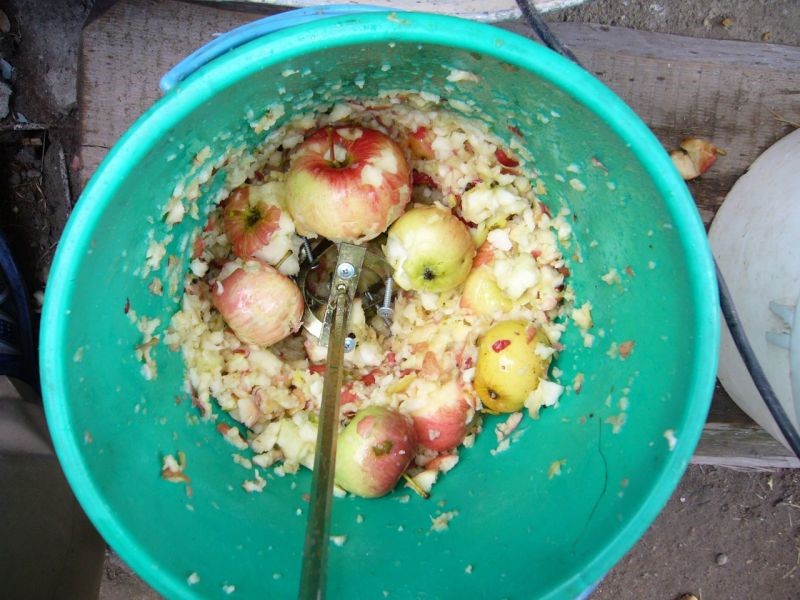
Mixer chopping apples
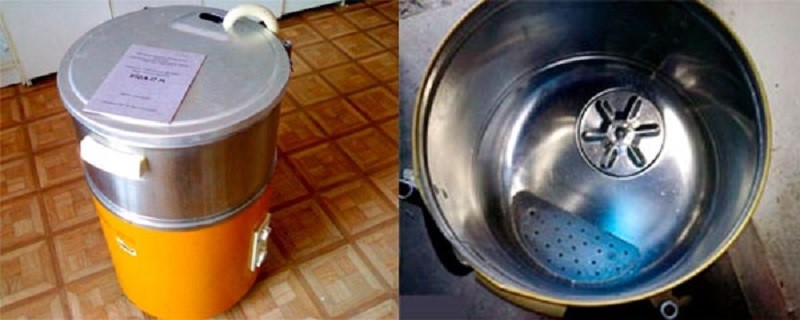
A large non-enameled pan is suitable for making a press. Drill holes in the pan bottom with the same frequency as in the colander.
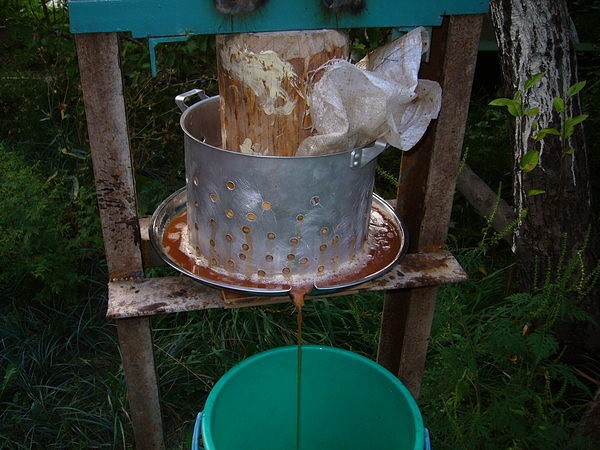
Pan Juicer
The bag is laid in a modified pan and placed under oppression. Apple or pear juice flows through the holes, the cake remains in the bag. Instead of oppression, you can use a hydraulic jack.
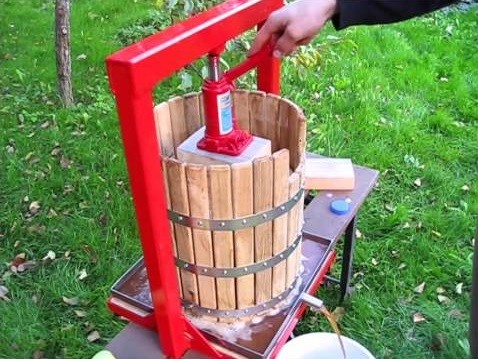
The use of a jack for squeezing juice
This method provides less productivity and depth of processing of raw materials than the manufacture of a full-fledged home-made juicer used for processing apples.