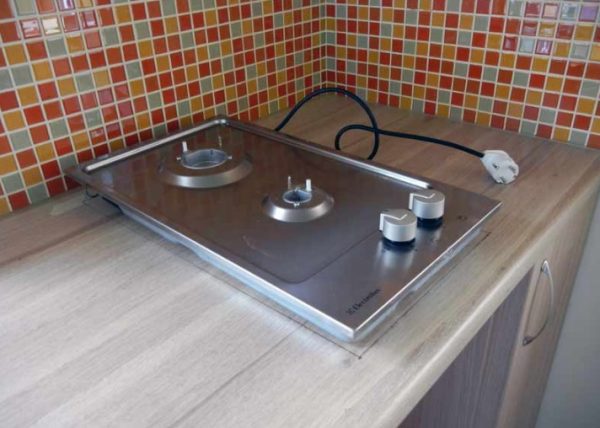
Modern kitchen sets allow you to independently install a gas, electric or induction hob. Such models can be operated both in conjunction with the oven, that is, be dependent, and separately, that is, be independent. Despite some difference in their design, the general rules that should be followed during the work are similar for all versions.
Landing hole preparation
Markup
The appearance of the finished kitchen depends on how accurately the markup will be carried out, and an error of even half a centimeter will force you to acquire a new countertop.
There are two ways to markup:
- put the device in place and circle with a marker;
- calculate and mark the mounting location to the nearest millimeter.
Despite the apparent simplicity and attractiveness of the first path, there are a lot of chances to make mistakes and put the wrong markup.
Size Sizing
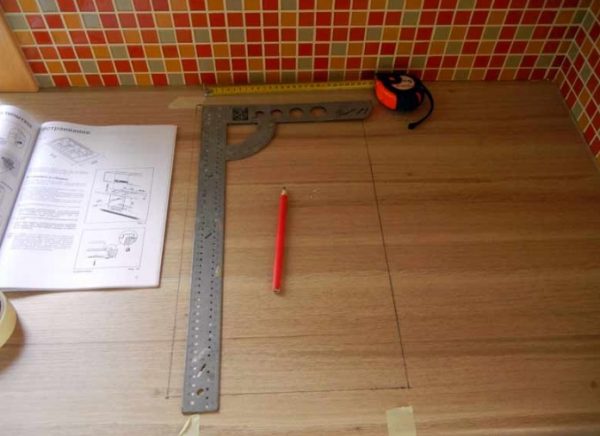
It is much more reliable to mark the installation site by careful calculations:
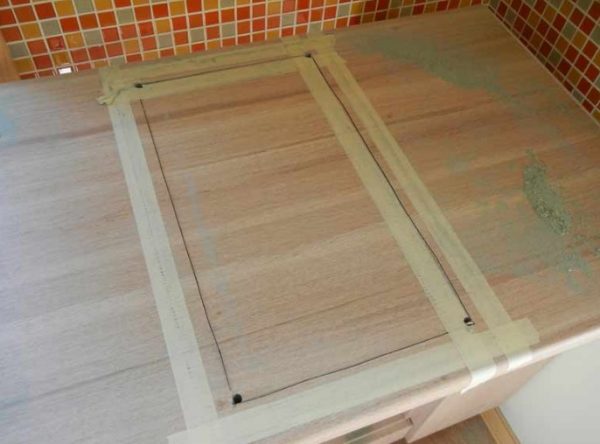
- On the surface of the countertop, the borders of the inner space of the cabinet are applied, over which the hob will be placed. Thus, the place within which the work will be carried out will be indicated. Markings should be applied with a pencil, so that at the end of the work the lines can be easily erased. If the countertop does not allow drawing clearly visible lines, then paper masking tape should be glued to its surface, and markup should already be drawn on it.
- It is necessary to find the future center of the hole in which the housing will be installed. To do this, the diagonals of a rectangle formed by the front and rear parts of the countertop and the drawn borders of the curbstone are drawn on the countertop.
- At the intersection of the applied diagonals, the center of the hob will be placed. Two straight lines must be drawn through it: one parallel to the edge of the countertop, the other perpendicularly.
- On these lines, it is necessary to note the dimensions of the built-in part of the housing. You can see them in the technical documentation or measure yourself. These sizes should be increased by 1-2 mm, so that later it is more convenient to install the device.
- Straight lines are drawn through the marked marks (parallel and perpendicular to the edge of the countertop). They form a rectangle, exactly corresponding to the buried part of the body and located in the center of the countertop.
- It is necessary to check that the minimum distance specified by the manufacturer in the technical documentation is observed between the final marking lines and surrounding objects.
- The resulting rectangle must be circled with a marker, and the excess lines should be erased so as not to make a mistake when cutting a hole.
The marked rectangle corresponds to the size of the hob
Hole cutting
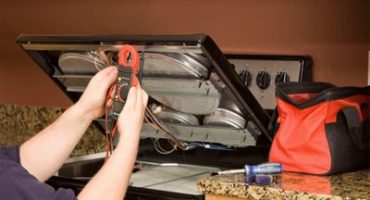
The following tools can be used to cut out the seat under the hob:
- milling machine;
- jigsaw;
- drill.
The highest quality cut is obtained when working with a milling machine. A slightly lower quality cut is made by an electric jigsaw with a fine-toothed file.
For work, you can use a drill or jigsaw
The procedure for cutting a hole with a jigsaw is as follows:
- At the corners of the marked rectangle (on the inside), drill holes with a drill of 8-10 mm.
- With a fine-tipped file, gently make a cut along the marked lines. The case of the jigsaw can not be kept "on weight", it should be pressed tightly to the countertop.
The hole is cut along the marked lines.
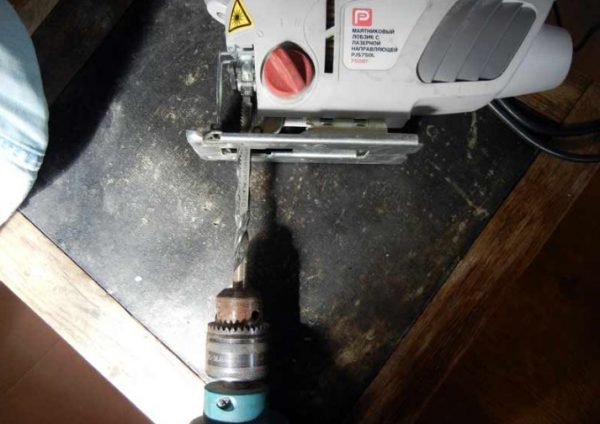
But not every household has convenient tools. Much less beautiful, but, nevertheless, a cut suitable for installation can be done using a conventional drill.
The procedure for cutting a landing hole using a drill is as follows:
- Drill 8-10 mm holes along the intended line. They need to be drilled from the inside of the marks in such a way that the drilled places are in contact with the intended cut line. Holes must be made as often as possible so that the cut-off piece of the countertop can be easily broken off.
- The rough edges of the hole must be aligned with the marked line. To do this, you can use a rasp or a small file on wood or metal. The resulting edges need to be made as even as possible.
Attention! After the landing hole is done, you must insert the hob into it. The device must enter effortlessly and completely cover the cut hole with its body.
Sealing hole
The next step is sealing. It is necessary to protect the countertops from water during cleaning or cooking. A wood or chipboard worktop may swell and deteriorate.
Sealing is carried out using acrylic sealant for plumbing work or nitro varnish. It must be carefully applied with a thin layer from the inside to the ends of the hole made. There is no need to apply sealant to the top surface of the countertop - a special gasket in the form of a sealing tape, which comes with the panel, will be used there.
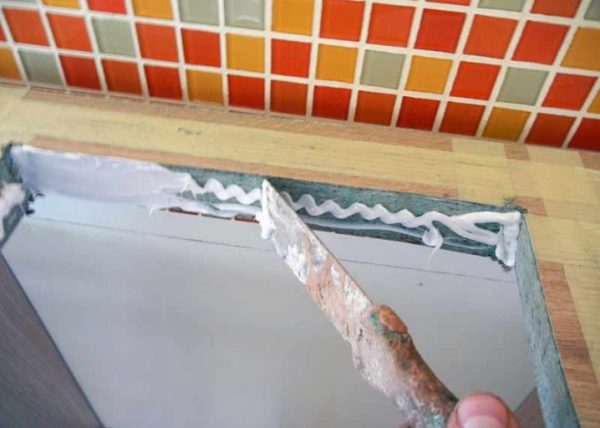
The ends of the countertops are treated with silicone
Sticker of sealing tape:
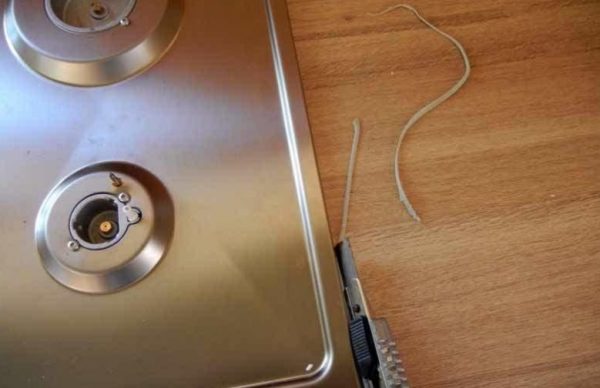
- An adhesive layer covered with a film is applied to the sealing tape. It should not be removed immediately all, but torn off gradually, as it adheres to the surface.
- The tape is glued around the perimeter of the landing hole in a single piece. At the corners it is not cut, but simply glued with a turn.
- The end and the beginning of the tape are joined end-to-end, without overlap and clearance.
Some manufacturers complete the hob with aluminum seals. Instructions for their installation are contained in the documentation for the device.
Panel mount
The hob is mounted as follows:
- The device is inserted into the landing hole and centered so that the front side is parallel to the edge of the countertop.
- Inside the cabinet, the housing is attached to the countertop with special plates included in the delivery.
- Installation must be done in such a way that there are no gaps between the hob and countertop.
- With a clerical knife, excess sealant is cut off from above.
The sealant is cut with a clerical knife
Connecting an installed hob
Electric panel
It is advisable to provide a connection point for the electric hob before installing the kitchen set. The socket must comply with all electrical safety requirements:
- have a ground line;
- The copper supply cable must have a cross section of at least 4 square meters. mm
A hole of such a size is cut in the rear wall of the floor cabinet opposite the power outlet that your hand can easily insert and remove the plug from the hob.
Outlets installed for self-connection are of two types:
- three-pin;
- four-pin.
If a plug is installed on the hob wire, then just plug it into a power outlet to connect. The power cord must be so long that it is not taut when connected to the device.
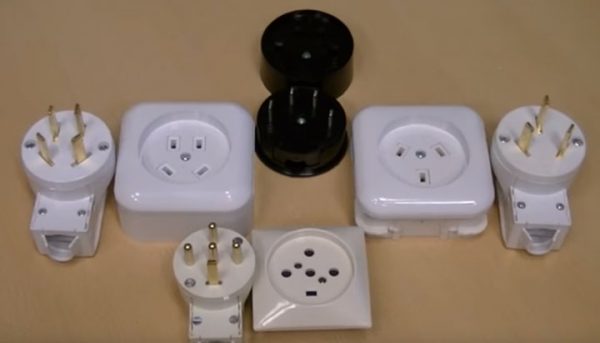
Plugs and sockets for connecting hobs
For models sold without a plug, certain actions will be required:
- If the outlet is three-pin, and there are four wires in the wire, then a two-phase model will need to be connected to a single-phase network. To do this, connect the wires with black and brown insulation in the cord. This connection is connected to the outlet phase. The zero blue wire is connected to the zero of the outlet, and the green-yellow wire is connected to ground. All connections must be securely insulated.
- If the location of the wires in the outlet is unknown, then with a multimeter it is necessary to determine the phase and zero. If necessary, they are interchanged so that they correspond to the wiring in the plug of the device.
Attention! By independently inserting an electric hob, it is necessary to provide for the mandatory installation of individual RCDs and a circuit breaker. For example, for an outlet in 16A, an UZO of at least 40A is required, and an automatic machine - at least 25A.
Induction panel
The induction panel is connected according to the same general principles as the electric one.
In many models there are no power cords, and only terminals for connecting an external cable are installed.
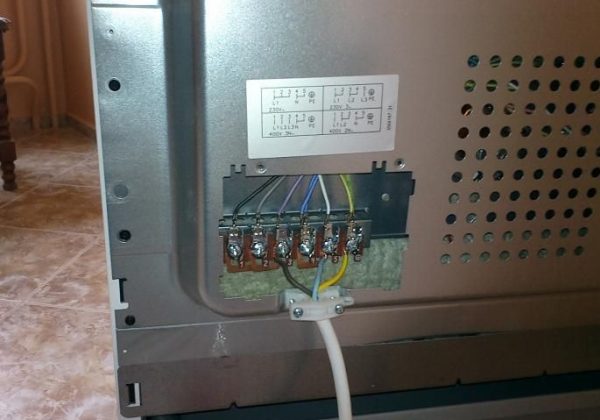
The wiring diagram is shown next to the terminal block.
Accession in this case is carried out in the following order:
- The protective cover is removed from the back of the device.
- An external cable passes through the cover.
- The cord is connected to the terminal plate in accordance with the diagram attached to the panel.
- If a jumper is installed connecting the zero and ground - it must be removed.
Gas panel
Domestic gas is a source of increased danger, therefore, special requirements are imposed on the kitchen room:
- The presence of a ventilation hood.
- Air inflow of at least 2 cubic meters per hour for every kilowatt of panel power.
- The distance to the wall is at least 130 mm.
- The gas supply hose must be positioned so as not to be exposed to excessive heat and to allow periodic inspection by the inspection organization.

The hob is connected with a flexible hose.
Attention! If the mandatory requirements are not met, the operating organization will not permit the operation of the installed gas panel.
The panel connection is carried out by a certified specialist in the following order:
- Fum sealing tape is applied to the threaded joints.
- Paronite gaskets are inserted into the gas hose.
- The hose is connected to the hob and the gas supply point.
- The joints are checked for leaks using soap suds.
- The power cord is plugged into a waterproof outlet.
For the operation of gas models, their acceptance by the service organization responsible for these works in the area of residence is necessary.
You can integrate the hob into the kitchen set on your own, conducting work carefully in accordance with the recommendations presented.