Bread is the main product, which must be on the table. Not a single dinner or banquet is complete without it. And to make a home-made bakery product, a device such as a bread machine helps. The device appeared relatively recently, but has become popular among lovers of delicious and healthy food.
Device
This article will show how this household appliance is arranged, and how to repair a bread machine on its own in case of any breakdowns.
The structure and functioning of the bread machine
Structure
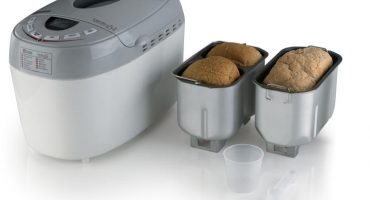
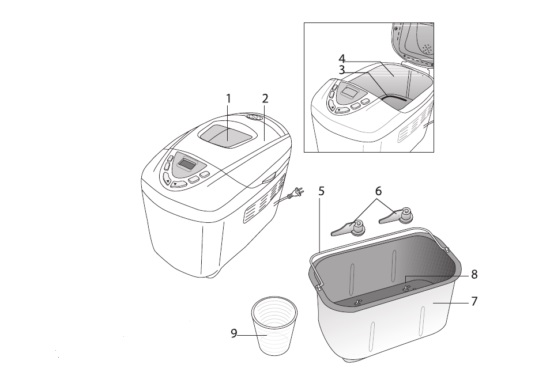
Today in the market you can find various models, brands of such devices that have various functions. The device includes the following elements:
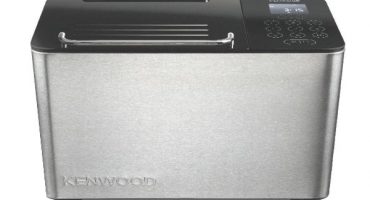
- The case is made of plastic, which is distinguished by its heat resistance. Case material can be stainless steel.
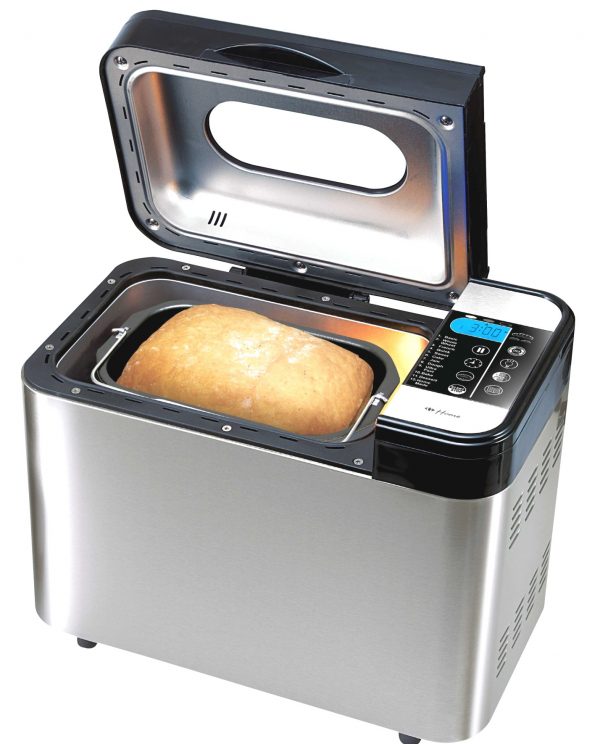
- A removable cover having an inspection hole and valves that allow steam to pass through.
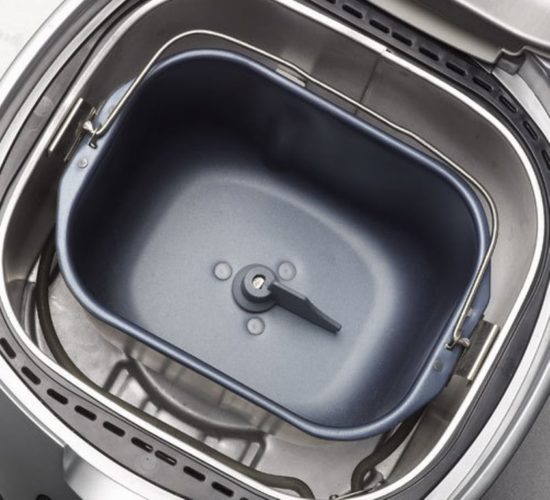
- Capacity in the form of a small bucket. That is, it has a rectangular shape. A non-stick coating is also available. Inside the bucket is a spatula that kneads the dough. Many models are equipped with two blades.
- Control panel (buttons or sensor).
- Display.
- An annular heating element located along the bottom of the working chamber.
- Electrical engine.
- Belt reducer located at the bottom of the device, under the electric motor.
Scheme
Consider the principle of functioning of the bread machine. A distinctive feature of the device is ease of operation. The baking process of a bakery product has the following algorithm:
- Ingredient loading and programmatic selection. The mass, time, color of frying is set.
- Kneading dough from the elements to the desired consistency. The procedure begins immediately after the program is launched. A spinning blade performs mixing. Due to the slightly flattened sides of the vessel, a better mixing of the layers is created.
- Upon completion of the previous process, the dough should stand for a certain period of time in the heat. This is necessary for it to rise.
- The second kneading begins, which is aimed at eliminating gases from the dough.
- Baking the bakery product itself. The electric heating element sets a certain power.
This is the whole principle of operation of this device.
Faults and their causes
v
Consider the most characteristic and common problems associated with the functioning of the bread machine:
- The shoulder blade cannot be removed. The reason is a clogged connection. Clogging is a dried dough.
- When the finished product is removed, a hole from the scapula remains below. The reason for this is the failure of the reverse of the electric motor, which is responsible for folding the mixer after kneading.
- A bakery product cannot be baked until fully cooked. So, the electric heating element has failed. Either the temperature sensor or the programmer has become faulty.
- There is a gap in the spindle. As a result, the oar sways and makes a rattle. This means that the metallographic sleeve on the gearbox has worn out.
- At the bottom of the compartment, water appeared, which indicates that the bearings of the bowl are worn out. Or the tank leaks in the place where the movable connection is.
- The scapula fails to turn. Maybe the belt is tight or the motor is broken.
- If the belt is completely torn or loosened, this leads to the fact that the blade stops turning independently.
- Another common problem is the wear of the non-stick coating on the baking dish.
If the baking device is broken, it is recommended to seek help from specialists. They will fix the damage using special equipment. But you should take into account the money spent, because it can be unprofitable.
Dismantling a bread machine
How to make out a bread machine yourself? In order to understand what the problem of the device is, it is necessary to disassemble it. Before disassembling the device, you need to carefully read its instructions and diagram. Different models have no fundamental distinguishing features.
The process of disassembling a household appliance begins with the removal of the lid. Next, the panel disconnects. The panel is fixed with bolts and plugs. The cable is unfastened from the board, the bottom cover is removed. Pull out the heater. So the household appliance is divided into the body part and the casing.
Disassembling some brands causes a lot of problems (for example, Redmont). It is difficult to get to the electric motor and the belt, because they are located at the bottom.
As soon as the device is repaired and the necessary parts are replaced, it is necessary to reassemble in the reverse order. In order not to be mistaken during the assembly of the apparatus, arrange the bolts and screws in separate boxes. When disassembling, remember the order.
Breakage removal
How to fix the device? How to repair a bucket of bread machines yourself do it yourself? We examined above what kind of breakdowns of this household appliance exist. Let's consider how to eliminate some of them.
The shoulder blade cannot be removed
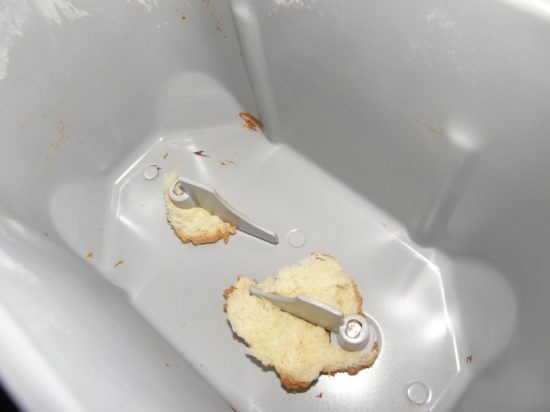
Leftover bread
This tool is constantly in contact with the dough, so after constant removal of the loaves, parts of the baked product remain.
Under the influence of high temperature, the blade can be tightly attached to the stem. To get rid of this problem, do the following:
- Pour warm water into the appliance container.
- Wait two hours for the dough to soak.
- Drain the water.
- Remove the stirrer. To do this, take the blade with one hand, with the other grab the sleeve on the other side of the bucket, which is located in the neck of the container.
- Clean and wash the stem and mixer.
Nothing complicated.
Sleeve Repair
Wear of the sleeve on the stirrer rod results in clearance. The shoulder blade begins to swing. Because of this, the whole bread machine, after switching on, squeaks and starts to work noisily. To replace the sleeve, disconnect the container. Remove the oil seal. Once this is done, do the following:
- The sleeve must be removed from the fit hole. For cutting, use an electric jigsaw. Then remove both halves from the mounting hole.
- Take a measurement of the mounting hole and select the unit of the required diameter and height.
- A new sleeve is inserted into the hole by tapping. The unit must protrude on both sides by one millimeter.
- Insert the shaft and fasten with the snap ring.
- Use silicone to lubricate the mounting holes of the neck. The sleeve must also be lubricated on the outer rim.
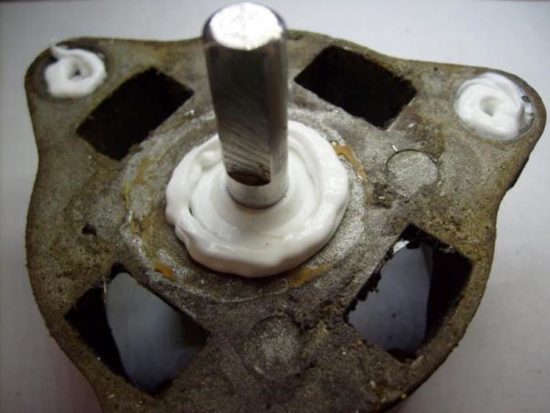
Silicone Sealing
- Screw on the neck using bolts.
Be careful.
Belt replacement
The belt replacement procedure includes the following steps:
- The bottom cover of the body must be removed.
- When scrolling, pull the belt.
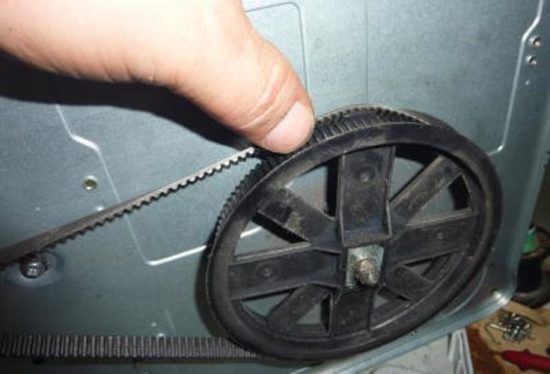
Need to push the belt
- Install a new belt on the motor pulley. Cog your teeth on a large wheel.
- At the end, the lower case cover is screwed on.
As you can see, nothing complicated. Follow the instructions given and no problems will arise. Repair the bread machine you can do it yourself.