Every housewife wants to have an ideal kitchen, in which all the necessary appliances for comfortable cooking are surely present. The arrangement depends on the area of the room, but a stove with a hob must be installed in it. If there are no problems with the choice of this device, then with the installation it is just the opposite. It is important to know how to properly connect devices such as a hob and oven.
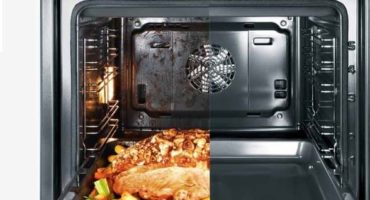
Hob oven
Basic rules for connecting the hob
Before you start connecting power electrical appliances, you should pay attention to the presence of grounding at outlets. It is worth considering that in old houses that were built before 1950, grounding was not performed. In these cases, you will need to consult an electrician, and additional work may also be required. It will be necessary to check the presence of the ground terminal on the power outlet.
The electric hob is connected to a specially branched outlet with a high ground level with a capacity of 25 to 32 A.
In order for the hob to be connected as required, it is necessary to remember several important rules:
- for outlets with high power, a prerequisite is the availability of a separate circuit breaker. Its installation is made directly in front of the counter. The best option would be to make the connection with the installation of a separate shield. This will protect against increased loads;
- it is recommended to use a copper wire with a cross section of at least 6 mm2;
- in single-phase wiring, it is recommended to install three wires, and in three-phase - 5;
- the choice of cable for outlets and wiring should be made taking into account the technical characteristics of the electrical device;
- installation of sockets with high power can be done for any non-combustible surfaces with high resistance to heat.
When selecting a cable and an outlet for the hob and oven, it is necessary to take into account the total power indicator of electrical appliances that can be connected to the power circuit. These may include a refrigerator, washing machine, dishwasher, and other devices. It is not necessary to make a new wiring for each device, it will look very illogical.
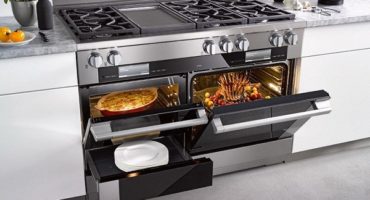
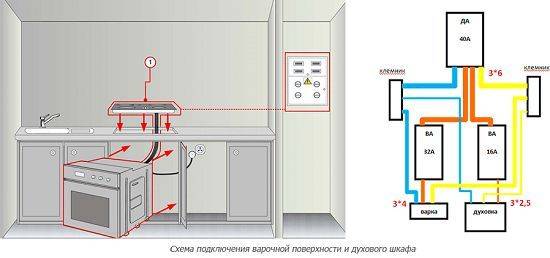
Connection diagram for hob and oven
How to connect the surface and the oven to the electrical network with your own hands? This is not so difficult, the main thing is to learn the basic rules.
A dedicated line with a separate outlet of a special design must be used for the oven and hob
In many new apartments for the hob there is already a separate cable and a special outlet. In these cases, you will need to buy a special plug. But in old houses, these devices are not always provided.
If the apartment does not have a separate cable and outlet for the hob, then this device should be connected in accordance with important recommendations:
- The first step is to check the allowable voltage indicator for which the household appliance is designed. Be sure to check the connection diagram recommended by the manufacturer of the device;
- You can find out the permissible voltage indicator and the type of circuit in the instructions that are attached to the household appliance.Additionally, it is worth inspecting the connection area on the device;
- hobs can be connected to a network with a voltage indicator of 220 V and 380 V, ovens - 220 V. The factory terminals for connecting the cable are installed with jumpers that provide the ability to connect to a 220 V outlet;
- standard kitchens cannot have network outputs with a voltage rating of 380 V, this does not meet the requirements of SNiP. They are usually equipped with 220 V sockets;
- must be installed in the electrical panel of a separate circuit breaker. A separate cable is laid from it. The current rating of the machine to protect the network and the connection option may depend on the level of potential load;
- to connect electrical devices that have a power of not more than 5 kW, a current of 25 A is required, the cable cross-section must be at least 2.5 mm2. If more powerful products are used, for example, with 36 A or 40 A, then in these cases it is worth using a cable with a cross section of 6 mm2;
- preference should be given to non-combustible cable brands, it is desirable that they have double insulation with a moisture-resistant structure. Most suitable would be VVGng;
- to connect the cable to one phase, it must have 3 cores. To connect the circuit with two phases, it is worth using a cable with 4 cores, and for connecting a three-phase circuit, you will need a cable consisting of 5 cores;
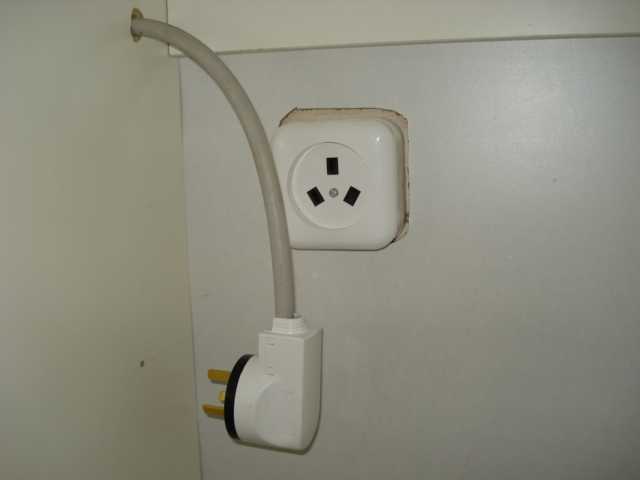
- at the end of the connection process, you install the outlet and connect the plug with the cable. But at the same time, it is worth choosing the right plug and socket.
Before turning on the hob, you need to choose a plug
In some cases, electricians during the installation of household appliances connect cooking surfaces and ovens using terminal blocks that are installed on the surface of the wall without using a plug and socket. However, this connection method is inconvenient and not entirely suitable for use.
If you have to dismantle the hob, you will need to climb into the terminal box, and during installation it will need to be switched again. If the plug and socket are used as connecting elements, then this process will be much easier.
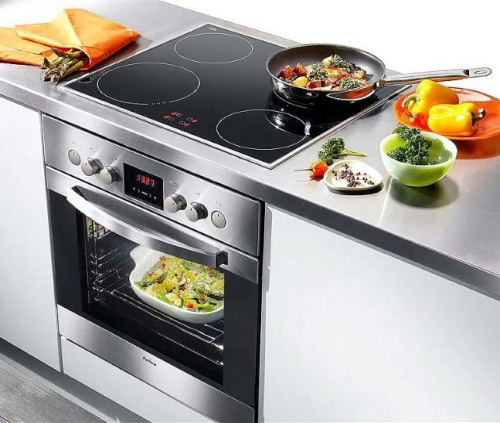
Implementation of the connection diagram of the hob and oven
In accordance with construction rules and regulations (SNiP) connection of electric stoves should be performed using the radial method, namely: for power, a separate cable should be allocated, which extends from the place with the main switchboard. In no case should you install other sockets and electrical appliances on this cable.
Before turning on the device with a single-phase system, it is worth studying the instructions
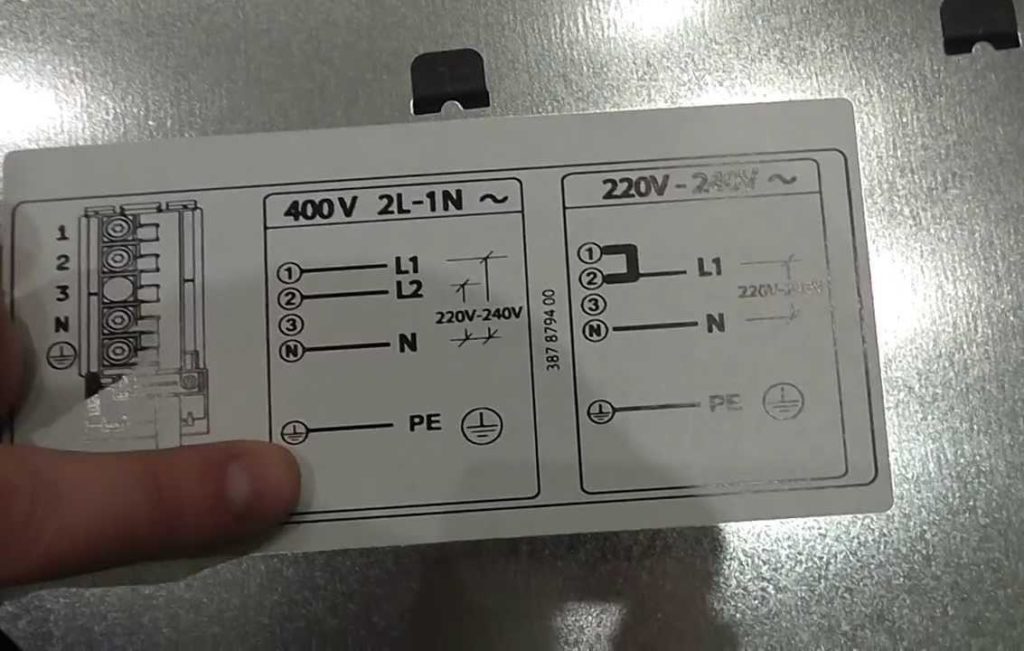
To connect a surface with an electric stove, the circuit provides for the presence in apartments of only one phase with a voltage indicator of 220 V.
In private homes, it is recommended to use a three-phase wiring diagram from the main power supply line. If this particular method of connection is made, then during the simultaneous operation of several burners the main load level will not be on one phase, but will be evenly distributed between the three phases and prevent network overvoltage.
Be sure to study the wiring diagram
If the power input on the terminal box of the device was originally designed to operate on a network with a voltage of 220 V, then it needs to be redone so that the device can function normally with a three-phase network with a voltage of 380 V. In these situations, you must perform the following steps:
- First of all, you need to use a screwdriver to loosen the terminal clamp bolts;
- pull out jumpers;
- the result should be 5 places to connect;
- in order for the load to be distributed evenly, it is necessary to install a circuit with two phases - with zero and ground.
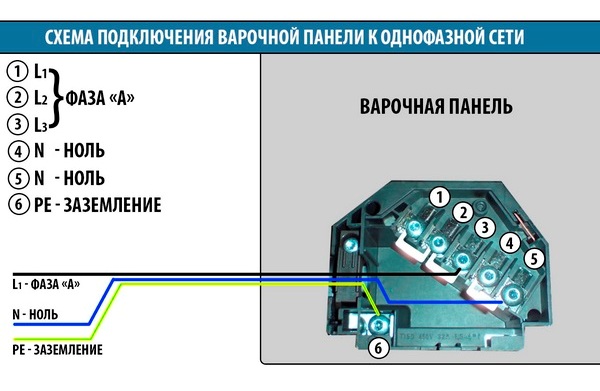
Single-phase network connection diagram
It is worth noting that in many wiring diagrams, the phases have the following notation:
- 1L;
- 2L;
- 3L;
- the neutral conductor is marked N;
- grounding is the sign "earth".
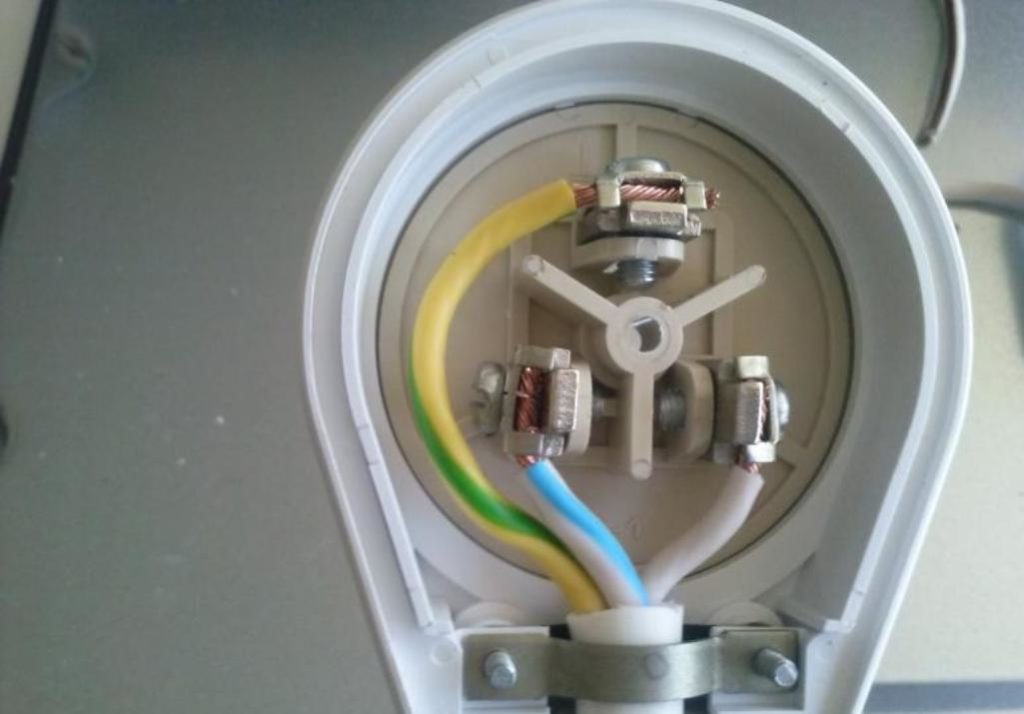
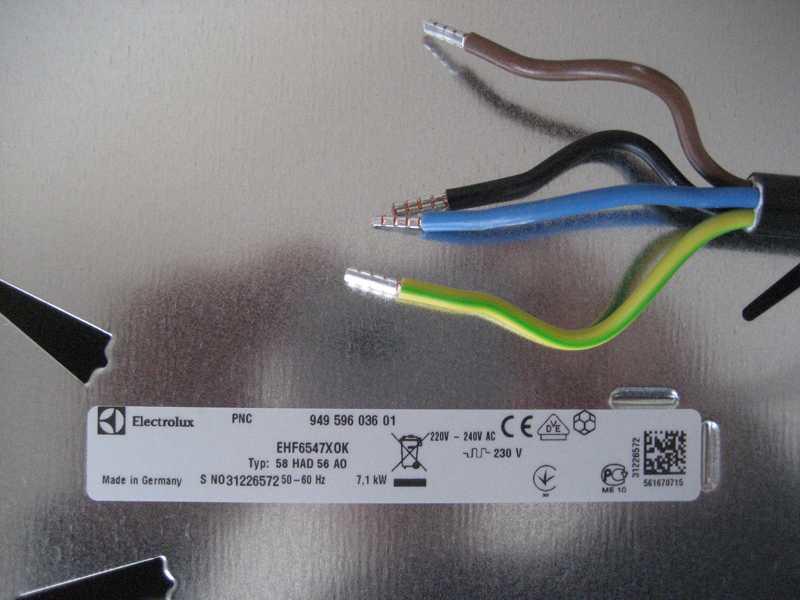
There are times when some manufacturers do not use the built-in terminal boxes, they remove wires from the device with different colors, while they can be connected to each other.
It is important to know the purpose of all the wires according to their colors:
- grounding is performed by a wire with a yellow color, it has a green longitudinal strip;
- the neutral wire may be green or blue;
- phases can have any color.
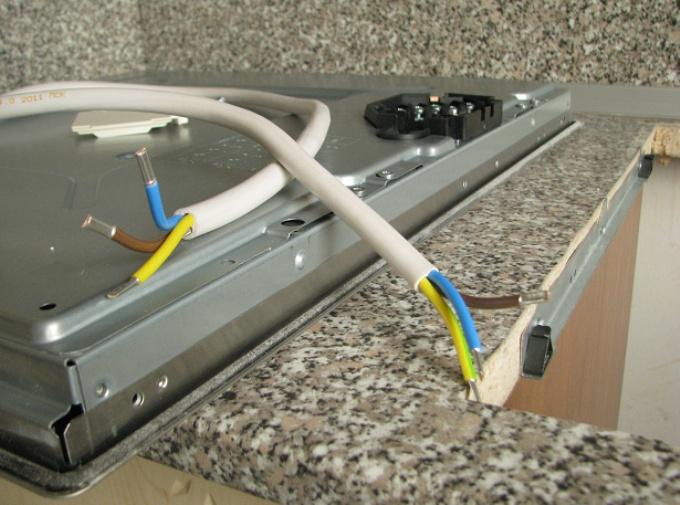
The hob is connected to the radial cable area using a terminal block box or socket. Usually there are no differences in the layouts and installation methods between the gas stove and the hob.
Wiring diagram
The installed plate is connected to a wall outlet or wall box using a power cable. If it is not provided in the kit, then this product must be purchased separately. When choosing, it is worth considering the cross-sectional indicators and the number of cores. A plug is installed on the selected cable.
Features of the outlet for the hob and oven
Regardless of how the hob and oven will be installed (standard or induction), you must definitely select the required outlet. All sockets that are rated at a current rating of 25A are power.
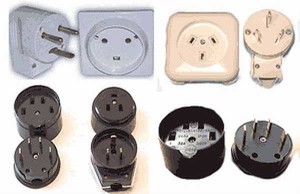
Models of sockets and plugs
According to the installation method, they are divided into the following varieties:
- external or overhead. The installation of sockets of this type is performed directly on the surface of the wall plane. They are conveniently used for laying cables using the open method. They are also often installed in houses made of wood and with a high indicator of humidity;
- internal view. Their installation is carried out in special socket boxes, which are mounted directly into the thickness of the wall partition. These varieties are installed in houses made of concrete or brick.
It is worth considering that the device of sockets can be divided into types depending on the purpose and features:
- products that can be used to work on the network with a voltage rating of 220V;
- devices capable of working in networks with a voltage of 380V;
- having a separate contact for grounding or without it;
- sockets that have a latch in the design for securely holding the connection with the plug. In this case, the fixation can be of two types - push-button or threaded (using a union nut);
- products that have integrated devices, such as RCDs, trip time relays;
- You can find appliances that are equipped with curtains. They are required to close the inlet of the outlet. These products are especially suitable for use in families with small children.
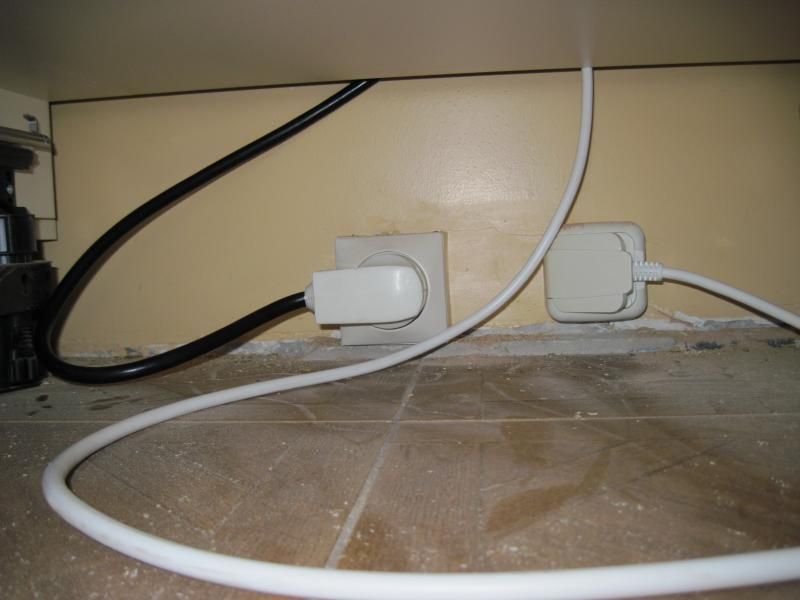
Outlet Installation
Be sure to consider the power indicators of the electric stove when choosing sockets. For example, if the oven has a power level of not more than 3.5 kW, a current of 16 to 25A will be enough, if the stove has an indicator of 7 kW - not less than 32A, but for more powerful devices, 65 A.
In any case, the installation of the hob and oven must be carried out taking into account all the requirements. The dimensions of these devices must exactly fit the standard dimensions of the kitchen. It is important at this stage to think over everything - the place for installation, the arrangement of the outlet and cable for connecting the device. It is best to entrust this work to an experienced electrician who can do everything in accordance with all standards.