A modern kitchen equipped with built-in appliances greatly facilitates household chores due to its versatility and high technology. A household appliance such as an electric oven has gained wide popularity. Most consumers after a purchase ask themselves the question: how to properly integrate and connect an electric furnace.
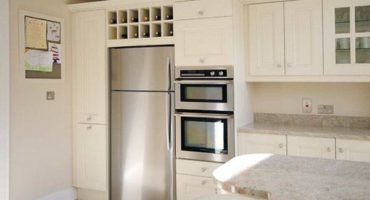
Oven model
How to connect the oven to electricity
In order to properly connect the oven to the mains, it is worth following the following recommendations:
- Read the operating instructions for this device. Determine the type of network and installation location. The oven has advantages over other models in installation options: it works only from the mains, it does not need gas;
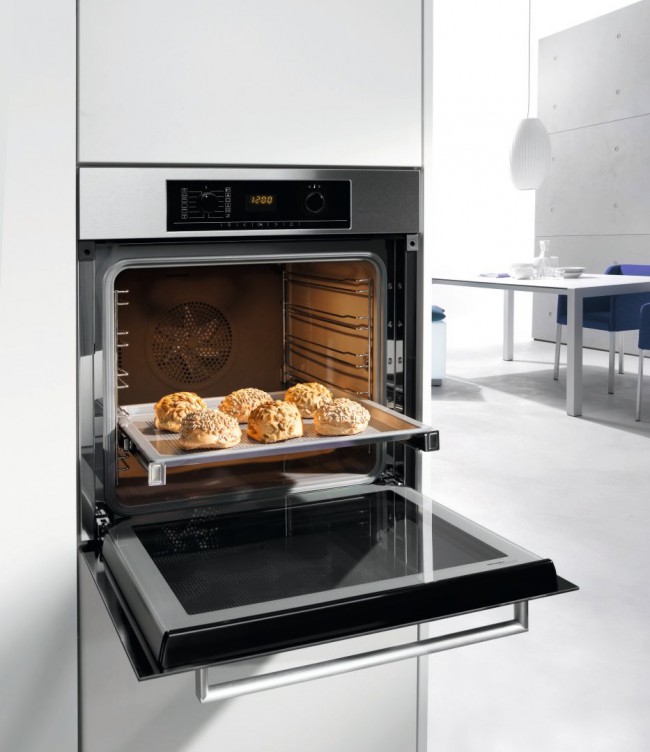
Learning Instructions
- Most manufacturers follow the ISO system. Dimensions (height and width) should correspond to the dimensions of the kitchen set. Must be present exhaust ventilation according to SNiP. Permissible dimensions: bottom 50 mm horizontally from touching objects, vertically - 50-70 mm, in the presence of a well-ventilated air gap;
- A prerequisite is the arrangement of household appliances in relation to each other. It is not recommended to put the cabinet next to other appliances: a washing machine and a dishwasher, a coffee machine, dimmers.
Devices that the oven cannot be installed with
Installation Rules
If the apartment has voltage 220 V installed, connecting the device is not difficult. If the network has a voltage of 380 V, it is worth using combined devices that can operate at 380 V.
It is recommended to install the oven in the kitchen, in which an outlet (outlet) is provided specifically for this device. It is not recommended to use the plug connectors of other devices. This equipment requires a dedicated power line.
According to the type of wiring, the appropriate type, brand and cross-section of the power wire is selected. If the installation is performed in a hidden or external form, the cross-section of the supporting supply conductor is determined. A cross section of less than 2.5 mm should be replaced with a minimum of 3.5 mm, as modern equipment manufacturers produce equipment with a capacity of at least 3.5 kW.
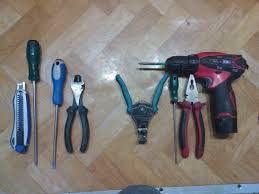
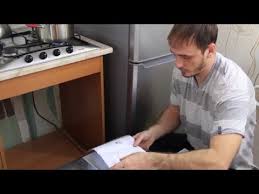
Tools for work
We proceed with the installation of the oven. Due to switching connections, it’s not easy to figure out the correct connection diagram for the oven. For this reason, the assistance of a specialist in the energy supply company may be required. After clarification, you can proceed to install the device yourself.
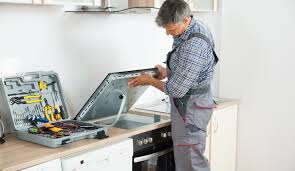
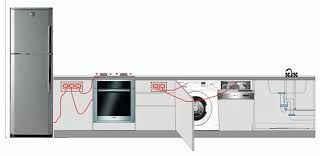
Hob installation
Electric cooker wiring diagram and precautions
Regardless of how the oven will be installed (air or water cooled), the entire connection process must be carried out correctly. It is best to entrust this process to professionals, because with an independent connection you can make a mistake, and this will lead to failure of the device.
It is worth paying attention to one significant advantage of modern apartments: they already have a special outlet or transfer case. Owners of private houses or old apartments will have to install it themselves.
In order to connect platemust have in stock:
- three-core cable with a cross section of 4-6 mm. The section size depends on its length - the longer the cable, the thicker the section. All this also affects the ability to withstand voltage;
- You will need a separate machine, which will be installed in the shield. It is needed to connect household appliances. Choose a device worth 32 or 40A, this figure depends on the size of the section;
- RCD is a residual current device that protects expensive equipment from overvoltage.
It is strictly forbidden to use:
- extension;
- carrying;
- build up and connect power wires;
- other materials not provided by the manufacturer.
It is not allowed to use flushing agents, wet rags, water-emulsion-based detergents, and rough wipes to care for the cabinet.
Requirements for materials and related products - according to the instruction manual. It is not recommended to make changes to the factory design that differs from the standard design provided by the manufacturer.
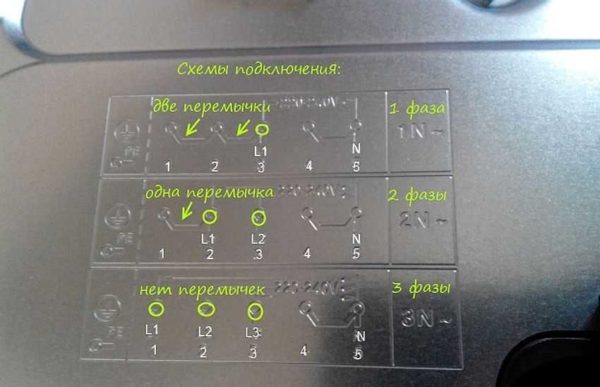
Example table for setting jumpers
It is allowed to lay the power cable in the corrugation, because it does not burn and does not support combustion. You can protect yourself as follows: run the cable channel from non-combustible asbestos cement or choose a material that meets the norm of indestructible control.
After a long interruption in operation, perform the same operations as for the initial connection. Connect the oven only after you are fully convinced of complete safety. There should not be any foreign objects that could lead to disruption of the connection process.
Security

Single phase wiring diagram
The following safety measures apply:
- circuit breakers;
- self-healing triodes;
- transformers and autotransformers;
- gas discharge devices;
- Arrester.
There are 2 types of connection: star / delta (220/380 V). Given that the 220/380 network operates in an isolated neutral circuit, in the absence of an additional ground loop, it must be installed.
The installation of the ground loop is performed by the power supply organization. Self-installation is strictly prohibited!
With the European standard, the plugs are different for Euro-1 and Euro-2. Execution options: horizontal and vertical ("L", "0", "ground"). For a single-phase and three-phase circuit: A, B, C, 0 or ground.
After the installation and installation, we take out the back panel of the cabinet, making sure that the junction box is in the regular place, the position of the supply wire and ground is determined.
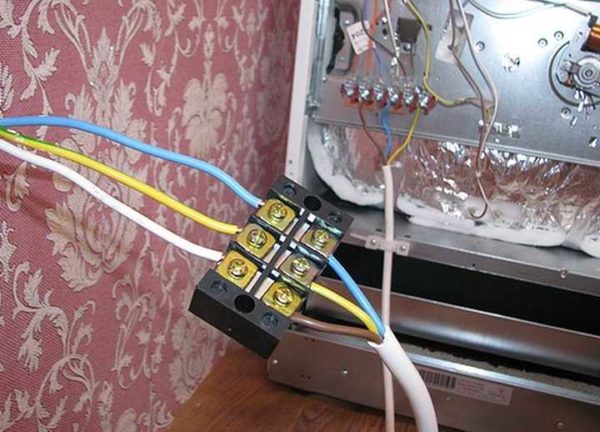
Using terminal block for electrical connection
The classification and coloring of wires is strictly regulated by GOST.
- gray is the phase;
- white is zero;
- blue - protective earth.
Today, a wide range of colors is widely used: yellow-green, red-white, black-brown, which are used in protective grounding. After opening the panel, voltage classifiers should be marked from left to right: “A”, “0”, “ground”.
- phase "A" must not have gaps in other switching devices. If the network load exceeds the installed capacity, installation or remounting must be performed in accordance with the rules;
- RCD installation is carried out with the condition that when entering the living room before the break, an identical type of device was not installed;
- the neutral conductor must have a cross section greater than ½ phase wire and reinforced with double insulation such as PVC, PVCS, PVCS 2 U;
- Next, you need to supply power to the control unit using special keys. You can control both remotely and from the control panel.
- when stationary connecting the oven, having a separate group for supplying electric power, the power supplied to the heating surface should be taken into account;
- Under the “timer” mode, it is recommended to set the temperature of the heating element to the “minimum” position. Apply power to the device, make sure there is voltage on the device, a red lamp indicates the presence of mains voltage.
Electric furnace: how to connect the device
It is much easier to connect an electric oven than a combined one. Its connection can be carried out in one, two and three phase way. If the electric network has a voltage of 220 V, then it is recommended to use the first option. If the voltage is 380 V, then it is worth using a two- and three-phase connection.
Single phase connection
After the installation and installation, the back panel of the oven is removed, which shows the wiring diagram for the electrical network. The position of the supply wire and ground is determined. The installation of the ground loop is performed by the power supply organization. Self-installation is strictly prohibited!
Intra house wiring in multi-apartment buildings is performed using a three-core cable. For the correct connection of a new electric furnace, special jumpers are used, made of copper with a cross section of at least 6 mm, which are located in the junction box.
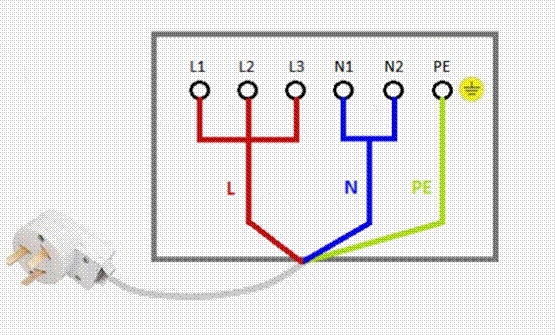
Connection diagram
The following connection scheme is proposed:
The screws No. 1, 2, 3 are connected by a bus with the symbol “L”;
- the next connection will be between screws No. 4, 5 with the symbol “N”;
- the last screw with the letters “PE” is used to connect the ground.
The wires must be arranged in the following order:
- brown wire - the phase that connects to the terminals L 1, 2, 3;
- dark blue - fixed at No. 1 and No. 2;
- green is the ground that attaches to the proper terminal.
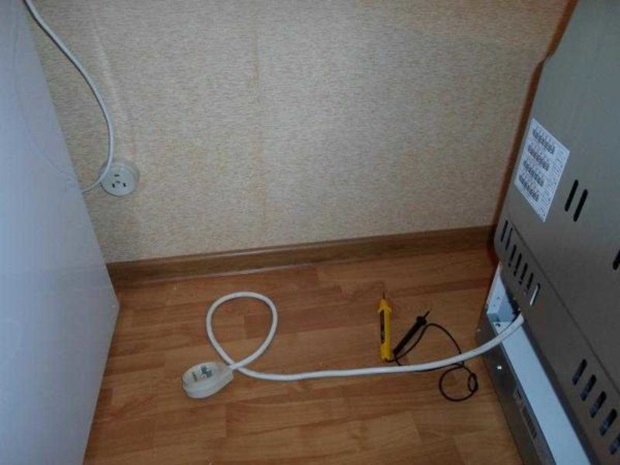
In some cases, a power cord with a plug is already connected to the oven
Having completed all the necessary installation and connection activities, the oven is checked for operability. If there is nothing sparking during the power supply, there is no smoke or burning smell, the light indication is functioning, this means that the connection is made correctly according to the factory instructions.