The home master, who decided to repair the failed vacuum cleaner on his own, usually does not encounter obstacles until he gets to the engine. Experienced repairmen offer several ways to disassemble an electric vacuum cleaner motor.
DIY disassembly of the vacuum cleaner engine
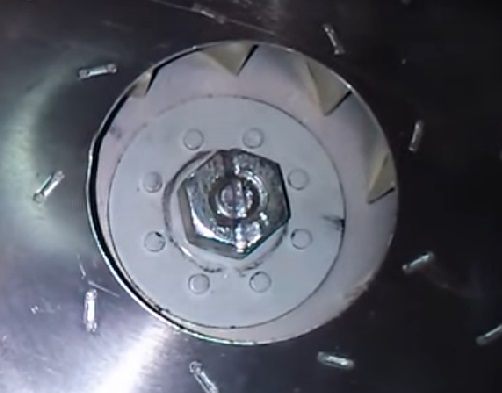
The impeller of vacuum cleaners of popular brands is fixed on the motor shaft with a nut, which seems impossible to unscrew:
- the nut is recessed into the recess of the impeller;
- the nut is fixed to the shaft with sealant or paint;
- the motor axis cannot be locked and the nut rotates with it.
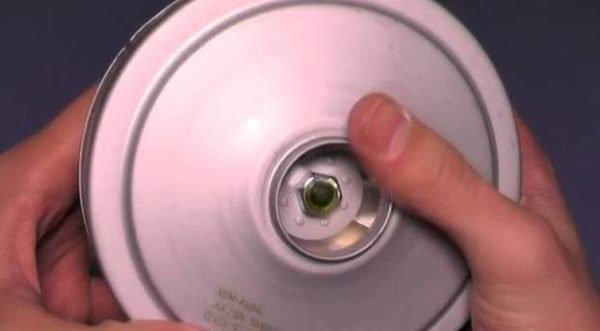
Impeller mounting nut
Important! Do not try to lock the motor shaft by holding it with pliers or jamming with a screwdriver through the openings of the brushes. This is likely to lead to damage to the contact group of the rotor or its winding.
Tools and Supplies
To disassemble the engine, you will need:
- pliers;
- flat screwdriver;
- key * 12;
- vise;
- hacksaw or drill with a saw blade for metal;
- files;
- wood block 10 * 40mm - 2 pieces.
The dimensions of the bars and nuts depend on the size of the window for the brushes of a particular model of the vacuum cleaner.
Disassembly procedure
The following steps should be taken during disassembly:
- Remove the brushes from the spring clips.
- Remove the cover blocking access to the impeller. Usually it is simply tightly mounted on the body of the electric motor, and with a pair of pliers it is enough to bend the edges slightly.
Cover removal
- In the openings freed from the brushes, you need to insert two wooden blocks perpendicular to the shaft and press them firmly against the rotor. This is most conveniently done in a bench vise, but you can also use a clamp of a suitable size. At the ends of the blocks facing the engine, a semicircular recess should be made with a file corresponding to the diameter of the rotor. This will help to fix it more reliably.
Inserting bars into the openings of the brush holder
- If the sticks extend beyond the stator by more than 1 cm, it is better to shorten them.
- The rotor is securely locked, it is time for the wrench.

The rotor is firmly clamped
- If the nut does not loosen immediately, apply CV-40 or another “liquid wrench” to the thread and let stand for 10-15 minutes. If there is a portable gas burner, then you need to set the width of the torch to a minimum and carefully warm the sealant in the thread without touching the flame with other parts of the engine
Important! On most vacuum cleaners, the nut for fastening the impeller of the electric motor has a left-hand thread. Unscrew it clockwise.
After unscrewing the nut, the impeller is carefully removed. Remember - this is a very delicate design, it is easy to mash and very difficult, almost impossible to straighten. The bracket securing the bearing on the impeller side is secured with several screws. They unscrew without any difficulty.
Upper bearing race mount bracket
Bearing removal
To dismantle the bearing you will need:
- Universal puller.
- Spacer. You can use a large screw for a hexagon (in the figure) or a bat.
The bearing from the motor axis is removed using a universal puller in the following sequence:
- adjust the puller to the size of the bearing by rotating the adjusting screw;
- hook the puller lips onto the bearing housing;
- insert a spacer between the rod of the puller and the end of the engine axis;
- turning the main screw of the puller, remove the bearing from the axis.
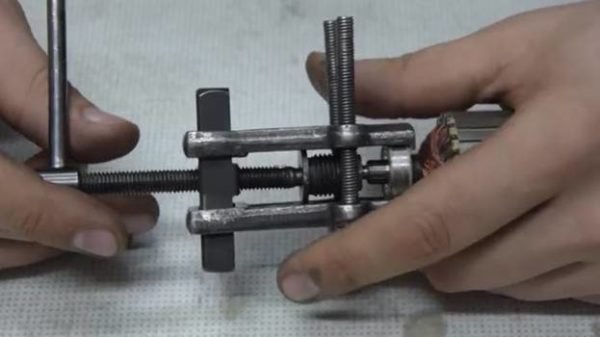
Pressing out the bearing with a universal puller
The stator and rotor windings, contact groups cannot be independently repaired, in this case it will be necessary to replace the rotor or the entire motor
Features of disassembly on the example of popular models
The design of the motors of most modern vacuum cleaners, despite the variety of brands, shapes and manufacturers, is very similar. Next, engine disassembly options will be considered using several popular brands as an example.
LG
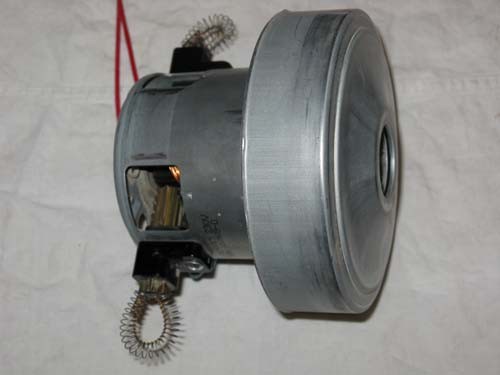
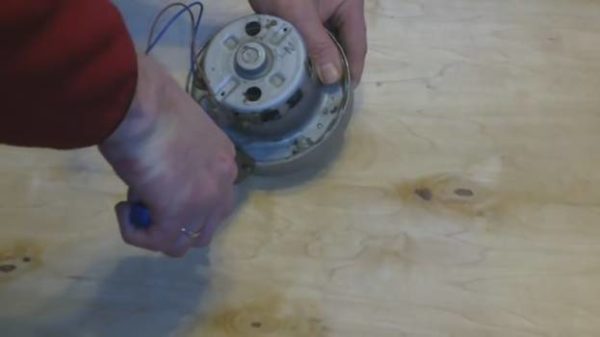
LG engine before disassembly
As in other models, first of all, it is necessary to remove the brushes and their mount. They are fixed with screws or spring latches, which are pressed with a thin flat screwdriver. Next, the impeller casing is dismantled. If it is rolled, the sides must be carefully bent with a thin screwdriver or a narrow metal plate. If it rests on friction, it is removed by gently tapping a wooden or rubber mallet.
Next comes the turn of the nut. Experienced craftsmen offer several ways to unscrew it:
- Wedging. A flat-head screwdriver is inserted into the end hole until it jams the stator and rotor. In this case, there is a very high risk of damage to the winding.
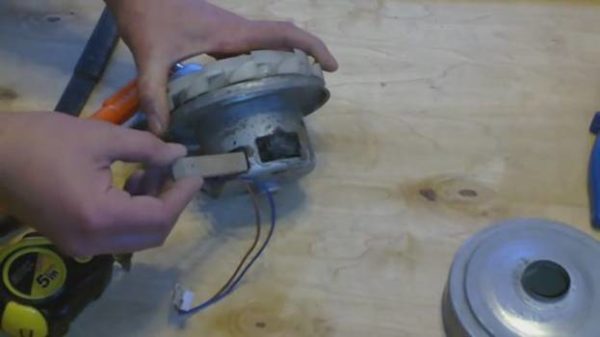
- Whetstones. The method is described above. Clamping the sticks in a vice should be very careful not to damage the rotor contacts.
- Wire. It will take 30 cm of soft wire in insulation (diameter up to 2.5 mm). The wire should be inserted through one window for brushes, loop over the rotor contacts and bring the end of the wire to another window. Rotating the rotor, you should wind the wire on it so that the turns are stacked close to each other, and the entire width of the gap between the rotor and the stator is filled. Thus, the shaft will jam, but due to the soft insulation, no damage will be caused. Instead of wire, you can use a long strip of fabric. After unscrewing the nuts, the wire or fabric is carefully removed, gradually turning the shaft in the opposite direction.
- Cut the shaft at the end. This method requires great accuracy in execution. It is worth trying if your locksmithing skills are adequate. The shaft end along with the upper part of the nut is cut to a depth of one and a half to two millimeters so that a slot is formed that is sufficient to hold the shaft with a flat screwdriver. Propyl is convenient to make with a hand engraver, a dremel, or simply with a drill, in which a diamond-coated disk is clamped. You should also gently warm the nut with a portable burner to soften the sealant or paint fixing it. By holding the shaft with a flat screwdriver, you can easily unscrew the nut.
Propylene Slot
Important! After sawing, it is necessary to remove metal filings from the surface of the impeller with a vacuum cleaner so that they do not get into the engine.
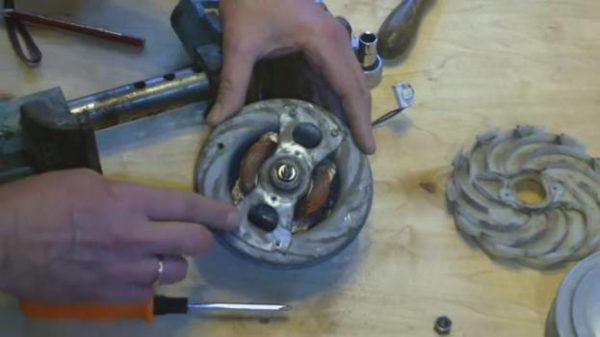
Further disassembly, as with other brands of vacuum cleaners, is not difficult. After removing the impeller, the remaining engine parts are removed, fixed with screws.
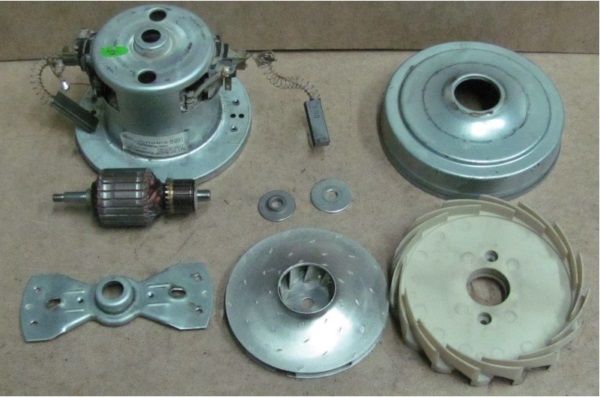
LG engine after disassembly
Bearings are removed by universal or specialized pullers. If the bearing is so damaged that balls have fallen out of it, the inner race is sealed with an abrasive wheel so as to minimize contact with the rotor shaft. After that, the coverage of the clip is weakened, and it is removed by tapping with a small hammer.
Samsung
The design of the motor used in Samsung vacuum cleaners is very similar to the LG engine
Disassembly should always begin with the dismantling of the brushes and their attachment site. Samsung fastens the brush holders on the screws.
Then you can proceed to further disassembly of the engine. The most difficult thing in this case is to unscrew the nut. Home masters recommend using similar methods for Samsung vacuum cleaners:
- slotting at the shaft end;
- fixation with a wire, cord or strip of fabric;
- fastening in a vice with wooden blocks.
These methods have been described in detail above. The choice of a specific method depends on the available equipment and the skills of the locksmith of a home master.
In the days before perestroika, all Soviet electric motors were produced with a slot on the shaft end. This was due to their more than average workmanship and the guaranteed need for repeated disassembly for repair during operation. Modern engines of leading manufacturers are designed and manufactured in such a way that its resource is enough for the passport service life. Dismantling and repair is not structurally provided for, the service policy is focused on replacing the entire assembly.
This challenge is taken by domestic home masters who love to get to the bottom of the matter and repair everything, regardless of the time and money.
The top engine cover on Samsung is not squeezed around the entire perimeter, but in four places. It is enough to find the first - the rest will follow in 90about The crimping places must be leveled with pliers, after that the cover is removed by hand.
The impeller is secured through the gasket with two clearly visible screws.
To remove the rotor, you must:
- unscrew the four screws holding the mounting plate holding the bearing race;
- remove the tabs from the grooves in the engine cover;
- beat out the rotor with the lower bearing through the wooden spacer.
Bosh
most home masters agree that it is better not to disassemble products manufactured by a German concern. Cases of successful repairs at home are almost unknown.
The same can be said about other brands - Philips, Beko, Miele, AEG and others.
Problems with improper disassembly
Careless handling and improper use of the tool can lead to the following problems during disassembly:
- Impeller damage. They are led by attempts to hold the motor shaft by the impeller while unscrewing the nut.
- Damage to the brush holder. They arise as a result of attempts to jam the shaft by inserting a screwdriver or pliers through the openings of the brush holders without dismantling the brushes.
- Damage to the contact group of the rotor. The reason is the same - attempts to hold the rotor with pliers or jammed with a screwdriver.
To avoid these problems, just follow the recommendations above.