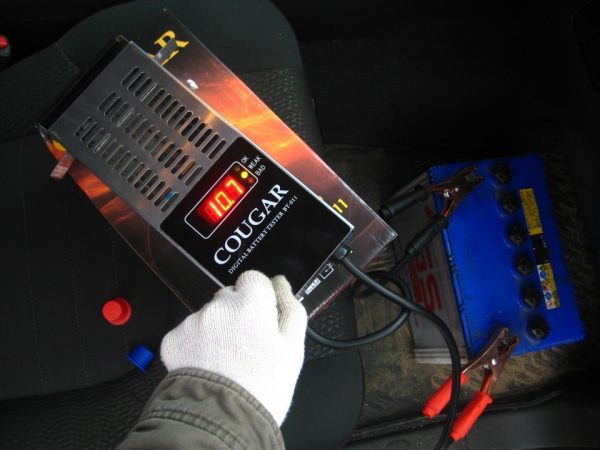
Many motorists found themselves in a situation where there is at hand accumulator battery, and the degree of her readiness for work is unknown. And I want to quickly determine whether it can be put on a car. The simplest battery tester is a load plug. Having it at hand and having little knowledge of its use, you can almost instantly determine the health of the battery, and at the same time evaluate its charge level.
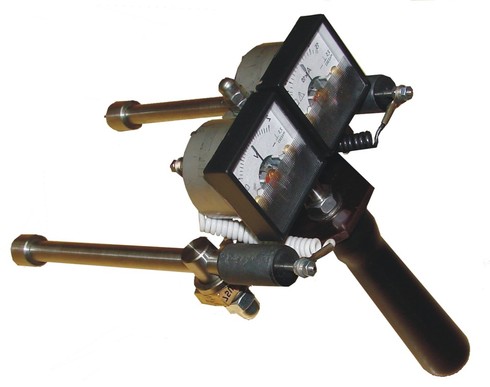
Load fork device
There is nothing complicated in the device of the battery plug.

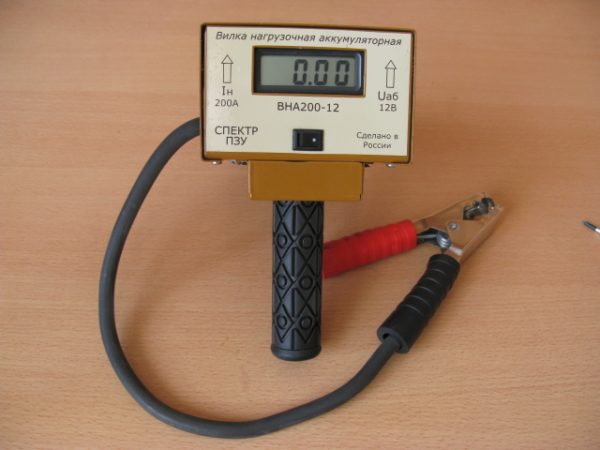
The modern look of the battery plug
Regardless of the type and design, its composition includes the following elements:
- A voltmeter with a measuring range corresponding to the voltage of the battery under test.
- A low resistance resistor that provides a working current for a device powered by a test battery when connected. This can be a homemade resistor made of nichrome wire.
- Wires and clamps for connecting the load to the battery terminals.
- In most modern devices, a switch or button is installed to connect the load to the work.
It is not entirely clear why the name of the plug is assigned to this measuring device. Perhaps this name came from the fact that the first models instead of clamps and wires had protruding contacts in the form of “horns”. And the whole design in appearance really resembled a plug that was “stuck” into the tested battery.
One of the old types of load fork
The principle of operation of the measuring device
Since a voltmeter is necessarily installed in this device, any rechargeable load plug can also be used to check the voltage at any point on the vehicle's on-board network. But its main purpose is testing the battery, that is, checking its readiness to ensure the working current value.
The contact terminals of the plug are connected to the terminals of the battery, and then the load is "turned on" for a short time. By the voltage level that the battery gives out after connecting the working resistance, and by changing it, a conclusion is made about the degree of availability of the battery and its serviceability.
Basically, such devices are used for automotive batteries rated for 12 V or 24 V. Therefore, the scale of the voltmeter should be up to 15 V, less often - up to 30 V. The operating current that ensures the start of the car starter is 80 - 120 amperes. The connected resistance of the device should provide such a current with the appropriate battery voltage.
Before turning on the load, it is useful to check the battery charge. To do this, measure the potential difference at the battery terminals in unloading mode.
For 12-volt batteries, their charge is estimated by the following voltmeter data:
Battery charge rating checked in idle mode
| Battery voltage, V | 12,7 | 12,5 | 12,2 | 12 | Less than 12 |
| Rating | Excellent | Good | Satisfactorily | poorly | No charge |
| The degree of charge,% | 100 | 75 | 50 | 25 | 0 |
It is clear that it does not make sense to check the operation of a weakly charged battery under load. By loading a large battery with such a battery, it can simply be damaged. First, it must be recharged, and then a readiness check should be made.
A fully charged battery will have to be tested for availability. To do this, connect the working resistance of the plug for a few seconds. According to the voltmeter, the degree of battery availability is determined.
Connecting the battery plug with load to the battery
Assessment of battery readiness for operation is carried out in accordance with the data given in the table:
Battery Availability Assessment Checked at Workload
| Battery voltage, V | >10,2 | 9,5 | 8,5 | 8 | < 8 |
| Rating | Excellent | Good | Satisfactorily | poorly | No charge |
| The degree of readiness for work,% | 100 | 75 | 50 | 25 | 0 |
It is worth noting that an additional indicator of the battery's suitability is the change in voltage at its terminals. In serviceable batteries, immediately after connecting the load, the voltage "subsides" to the minimum reading, and then gradually increases by 0.2-0.5 V. in a few seconds.
Varieties of Battery Charging Plugs
Even such a simple device is available in various versions. And this applies not only to his appearance.

Plug with dial gauge and two wires
Battery plugs differ in the following characteristics:
- Type of voltmeter. Now more often use digital displays instead of arrow ones. They give a better perception and allow you to more accurately assess the voltage change when testing under load.
- Measured voltage range and scale accuracy.
- The value of the resistance of the connected load.
- Changeability of load resistance. For different types of batteries, the operating current can vary greatly. If the device contains several replaceable load resistors, then it is possible for them to test the battery at different load currents. In modern load forks, the change in load resistance is carried out not by mechanical replacement, but by changing the load mode on the electronic display.
- An option to connect the device to the battery terminals. There are load forks with two wires and one wire. In the second case, the role of the wire is played by the contact pin located on the device body.
Single-wire digital display plug
How to use the load plug for the battery
Simple appliance corresponds to simple instructions for use. But compliance with simple rules will ensure the reliability of data on the state of the battery. And their violation can damage both the test device itself and the tested battery.
- Measurements with the connected load carried out for no more than 10 seconds. This time is enough to get all the necessary data. A long work under load will lead to excessive discharge of the battery and to overheating of the device's own resistance.
- Suitable temperature for testing is 15 - 20 ° C. Standard calibrations are performed at this temperature. And once again loading the battery, forcing it to work in negative conditions, should not be.
- It is necessary to check the reliability of the contacts when connecting the wires of the plug to the battery terminals. Bad contact will lead to false test results.
- Do not use loads that provide a test current of more than 120 amperes. Yes, at startup there are currents up to 200 A. But a battery capable of reliably delivering 120 A can withstand 200 A if necessary. Once again, it is undesirable to conduct a test under the most extreme conditions.
How to make a load plug for the battery yourself
If desired, you can make a homemade load fork. Of the finished products, you only need a voltmeter. Everything else can be built from improvised materials.
The greatest difficulty is the calculation and creation of internal resistance, calculated for the required current. If you do it yourself, then the most suitable material is a nichrome wire from heating spirals of electric stoves. You can pick up a metal strip from other heaters.In order to provide a current of 80 - 120 A at a voltage of 12 V, the load resistance should be 0.1 - 0.15 Ohms. Finding a multimeter capable of accurately measuring such resistances is difficult. Therefore, it is easier to choose the length of one element by measuring the current passed by it, and then connect several such wires or strips in parallel.

Calculation of the working resistance of the plug
Procedure:
- Using a multimeter with a measuring current range of up to 15 A, the length of one nichrome wire or heating strip is selected, providing a current transmission of 10 - 12 A. Or, with an accurate multimeter, measure the resistance at 1 - 1.2 Ohms.
- Parallel connection of 10 such elements will allow to obtain a load transmitting a current of 100 - 120 A.
- All elements are connected in parallel. It is better to twist the wire into a “braid”. For a more reliable twist, they can be clamped in the drill chuck or screwdriver.
- The fabricated resistance is placed in a suitable housing and secured in it. If you have to bend it several times, then you need to make sure that the turns do not touch each other. For reliability, insulating cylinders can be put on the bend points.
- The ends of the resistance are soldered to the output contacts, and the connecting wires are soldered outside.
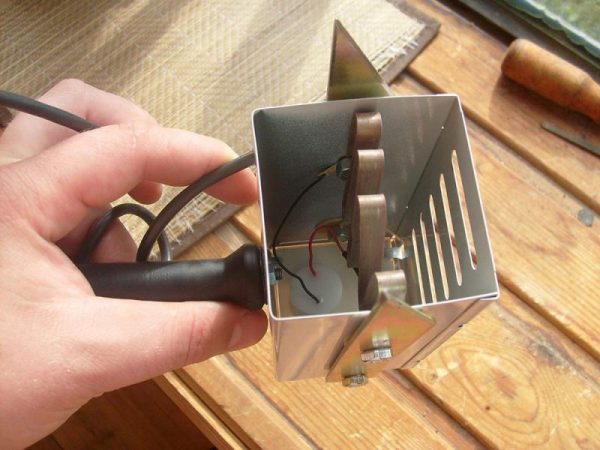
Homemade load resistance for the battery plug in the housing
- A voltmeter is connected to the load in parallel.
- At the ends of the connecting wires, clamps are attached to connect to the battery terminals.